A seam is different from the fabric it joins — when a seam fails, the stitching that held two pieces of a garment together has broken down, and depending on what actually happened, the fabric itself may be completely intact. That distinction is the starting point for this repair, and it’s what separates this from How to Fix a Tear in Clothing Without Making It Worse, which covers damage to the fabric itself more generally.
Three Different Problems That Look Similar
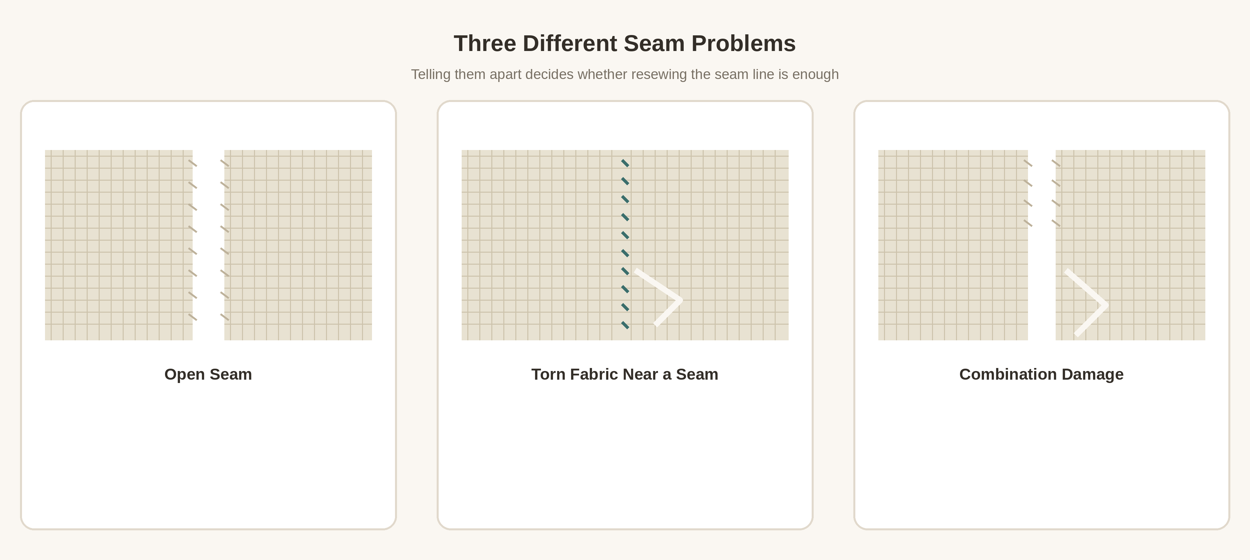
Before repairing anything, figure out which of these you actually have. An open seam means the original stitches have failed or come loose, but the fabric pieces themselves are largely intact — resewing along the original seam line is usually enough. Torn fabric near a seam means the garment material itself has ripped, often right at or just past where the seam line was, while the seam’s stitching may still be fully intact elsewhere. Combination damage means both have happened — broken stitching and torn fabric together. If the fabric itself is torn or significantly weakened, simply resewing the original seam line may not actually solve the problem, since the thread has nothing solid to hold onto right where it’s needed most.
Inspect Before You Touch It
Look for the original seam line, and check the seam allowance (the fabric between the stitch line and the raw edge) for fraying. Check how the fabric around the seam feels compared to fabric elsewhere on the garment. Look for exactly where stitches are missing or broken versus where they’re still intact. Consider where on the garment this is and how much stress it takes during normal wear. And check specifically whether the fabric has torn beyond the original stitching line, not just come apart at the stitches.
Look at the Original Construction First
Where practical, take a moment to notice how the garment was originally put together before you start: where the seam ran, how the two pieces aligned against each other, whether the seam allowances are still intact, and whether there’s lining or other construction detail involved. This isn’t about taking anything apart — it’s just useful information for getting the repair to match how the garment was actually built. If the construction is more complex than a simple seam (lining, multiple layers, structured details), there’s no need to dismantle any of it just to make a repair; work with what’s already there as much as possible.
Preparing the Seam
Where stitching is loose or broken, it usually needs to be removed cleanly before resewing rather than stitched over — How to Use a Seam Ripper Without Damaging Fabric is a natural prerequisite here. Remove only what’s actually loose or broken; there’s no need to rip out stitching that’s still intact and holding just because it’s near the damaged section.
Realign Before You Stitch
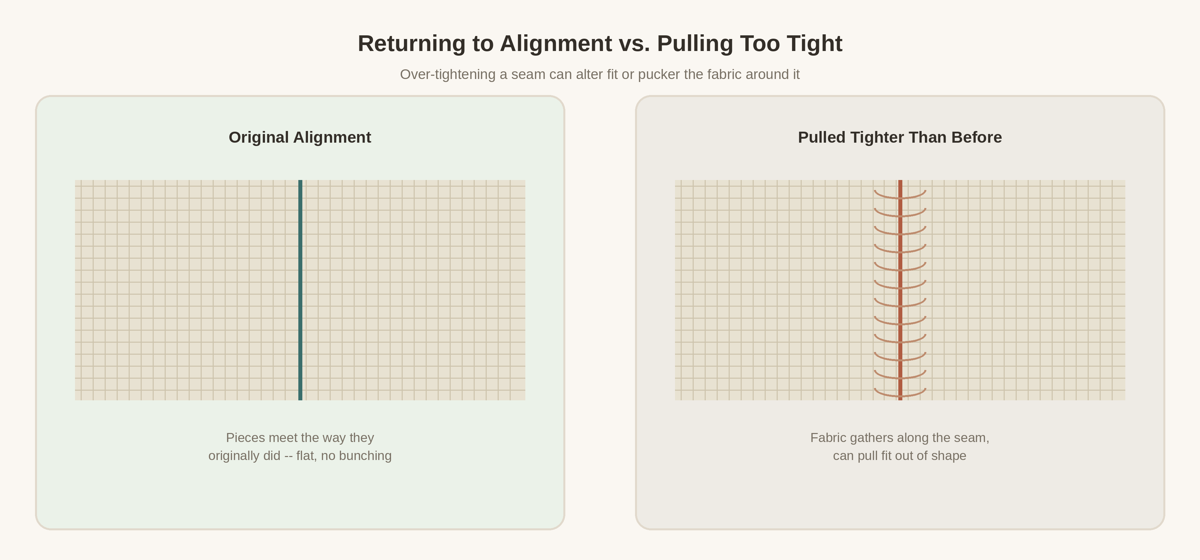
Return the two pieces of fabric to their original alignment rather than pulling them tighter in an attempt to make the new seam stronger. It’s a reasonable instinct, but over-tightening tends to gather and pucker the fabric, and it can subtly change the fit of the garment right at that seam. The original alignment — however the pieces met before the seam failed — is usually the right target to return to.
A Basic Hand-Sewn Repair
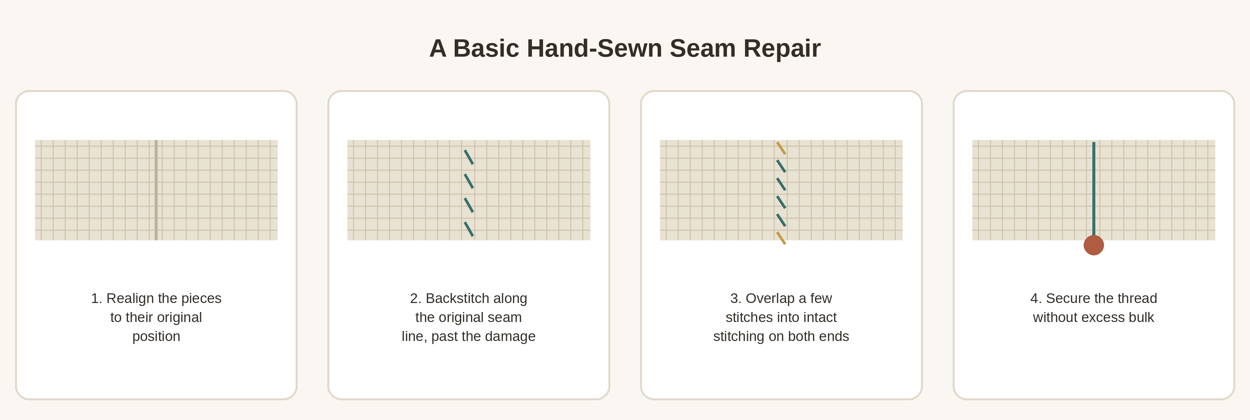
Basic Hand Stitches Every Beginner Should Know covers the underlying stitch mechanics referenced here. Backstitch is a commonly useful choice for structural seam repairs because each stitch locks against the last one, giving a fairly strong line — but it isn’t the only correct method, and other sturdy stitches can work depending on the fabric and seam. Whichever stitch you use, start a few stitches into the still-intact original stitching on one end, sew past the damaged section along the original seam line, and finish a few stitches into intact stitching on the other end — that overlap is what ties the repair into the surrounding structure rather than leaving it as an isolated patch of new stitching. How to Start and Finish Hand Sewing Without the Thread Coming Loose and How to Choose Thread for Clothing Repairs cover starting, finishing, and thread choice in more detail.
Seams That Take the Most Stress
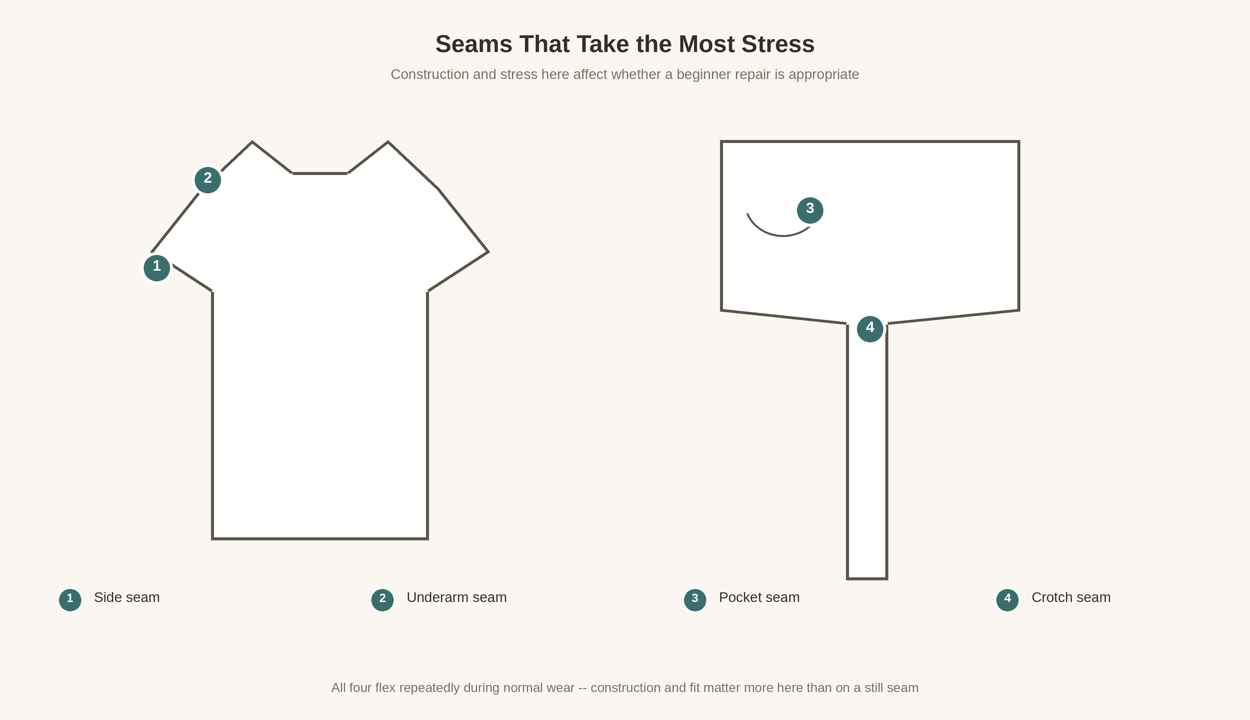
Side seams, underarm seams, crotch seams, and pocket seams all take repeated stress and movement during normal wear, which is exactly why they’re common places for a seam to fail in the first place. That repeated stress, plus construction that’s sometimes more complex at these points, can affect whether a straightforward beginner repair is realistic. A side seam on a simple shirt is usually approachable. A crotch seam, especially on a garment with more complex construction, may be trickier to get right — not because it’s impossible, but because there’s less margin for error and more at stake if the repair doesn’t hold.
Seam Allowance Isn’t One Fixed Number
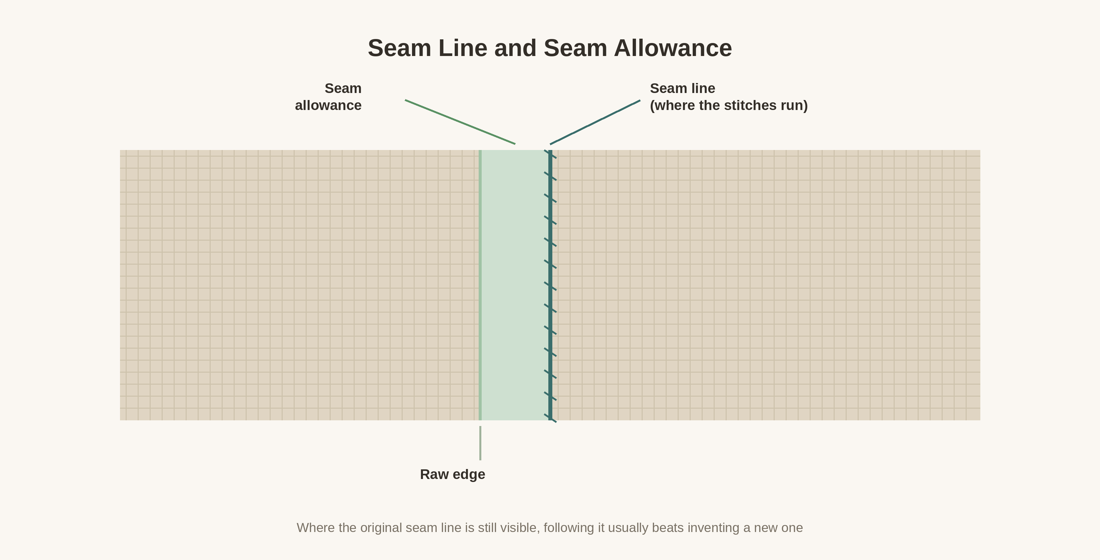
There’s no universal seam allowance width that applies to every garment or every repair. Where the original seam line and allowance are still identifiable, following that original construction is generally preferable to inventing a new seam line from scratch — it keeps the fit consistent with how the garment was made and gives you a reliable line to work from rather than guessing.
When to Consider Professional Help
A few situations are worth a second thought before diving into a DIY repair: lined garments, tailored pieces, seam allowances that are heavily frayed, fabric that’s torn alongside the seam rather than just at it, complex crotch construction, or a repair that would meaningfully change the fit. None of these make a repair impossible at home — plenty of people successfully handle seam repairs on all of these — but they’re situations where it’s worth being honest about your own experience level before committing to cutting into or heavily reworking a garment that matters to you.
Checking the Finished Repair
Turn the garment right side out and take a real look. Check that the pieces are properly aligned, that there’s no puckering along the repaired section, and gently test the area under the kind of movement or stress it would normally take — sitting, reaching, bending, whatever’s relevant to that seam. Confirm the repair hasn’t changed the fit of the garment, and check that the thread feels secure. These checks catch problems now, while they’re still easy to fix.