A seam ripper looks simple enough — a small hook with a point — but it’s also the tool beginners are most likely to use carelessly, usually by tugging on stitches instead of cutting them, or forcing the point through fabric that isn’t cooperating. Done carefully, removing stitches is close to risk-free. Done in a hurry, it’s the easiest way to put a small hole exactly where you didn’t want one.
The Three Working Parts
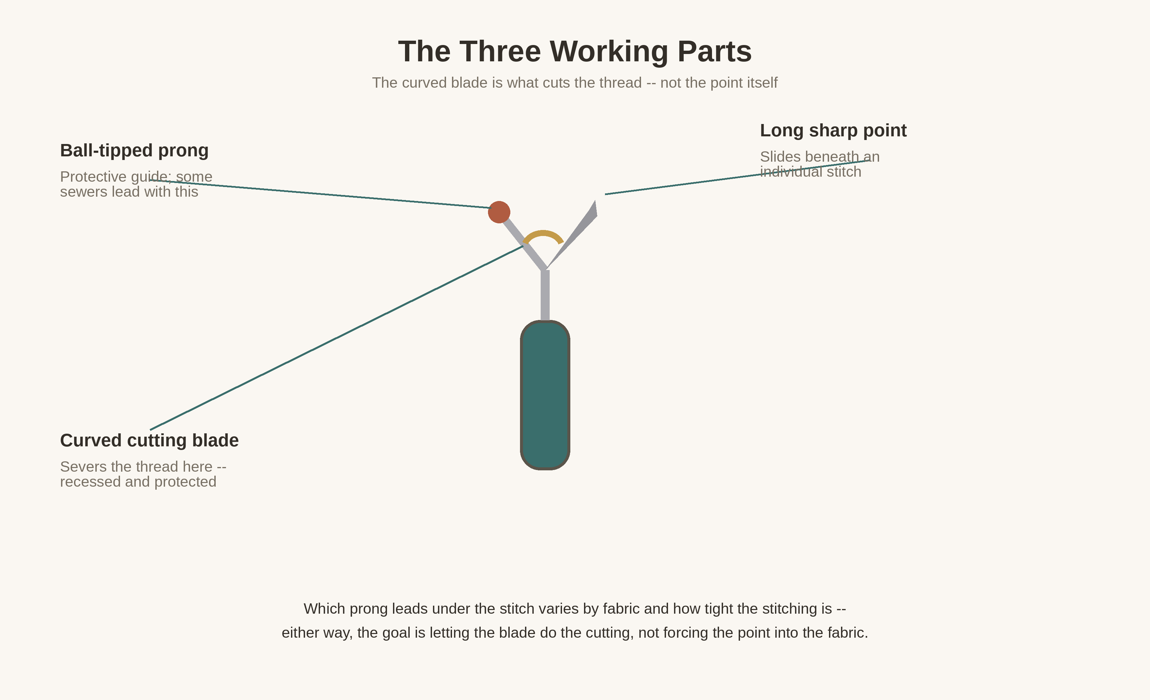
A seam ripper has three working parts: a long, sharp point; a small ball-tipped prong; and, nestled in the notch between them, a short curved cutting blade. The long point is generally what slides underneath an individual stitch, guiding the thread down into that curved blade — the blade is what actually severs the thread, not the point itself. Because the cut happens inside that protected notch rather than out against the open fabric, the fabric usually stays safe even though the point itself is sharp.
The ball-tipped prong plays more of a protective and guiding role. Depending on the fabric and how tight the stitching is, some sewers prefer to lead with the ball tip instead — sliding it under a looser stitch first before angling the point in — particularly on delicate or loosely woven material, where a very sharp point risks catching more than intended. Neither approach is universally correct; which one works better depends on the fabric, how the seam was sewn, and how tightly the stitches sit. What matters in either case is letting the curved blade do the cutting, rather than forcing the point to press or drag against the fabric itself.
Cutting Stitches at Intervals
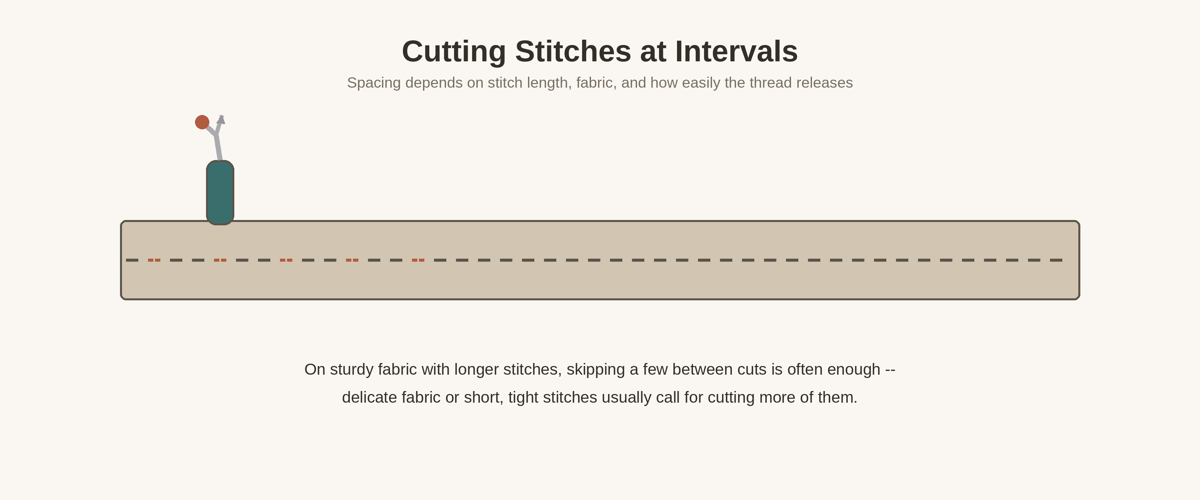
Rather than cutting every single stitch along a seam, it often works well to sever a stitch, skip a few, and repeat down the line — cutting only enough of them that the thread on the opposite side releases once you tug on it. Exactly how many stitches to skip isn’t fixed: it depends on the stitch length, the fabric, how the seam was constructed, and how easily the thread pulls free once a few stitches are cut. A longer machine stitch on sturdy fabric might release after every third or fourth cut; short, tight stitches, or stitching on delicate or loosely woven fabric, usually call for cutting more of them — sometimes nearly every stitch — and testing gently after each one rather than assuming a fixed interval will work.
Keep the Fabric Taut
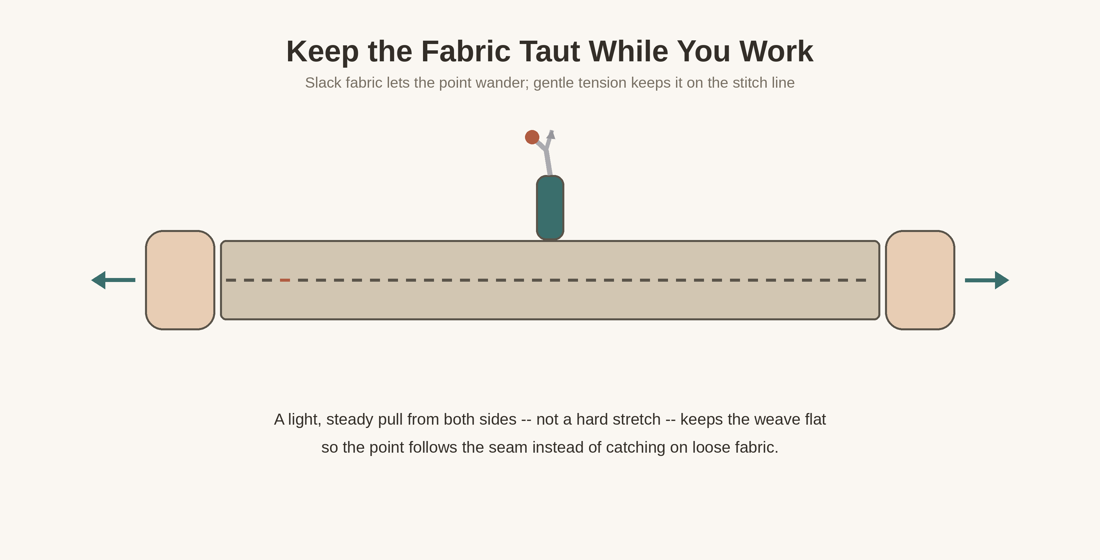
Slack, bunched-up fabric gives the point more room to wander off the stitch line. Holding the fabric gently taut on both sides of the seam you’re working — not stretched hard, just smoothed flat — helps the ripper track the stitching instead of catching on loose weave nearby. This matters more on loosely woven or delicate fabric, where a wandering point is more likely to snag a thread it shouldn’t.
When It Won’t Glide Easily
If the point isn’t sliding through smoothly, that’s usually a sign to reposition rather than push harder. A shallower angle, a slightly different starting stitch, or simply turning the fabric to approach the seam from the other direction often solves it. Forcing a stuck seam ripper is one of the more common ways beginners tear fabric they meant to preserve.
Some materials are worth extra caution regardless of technique: loosely woven or delicate fabric, and areas with fusible interfacing behind the seam, can be more prone to snagging or marking. Working in smaller sections and checking your progress often costs a little time but catches problems before they spread.
After the Stitches Are Out
Leftover thread fragments can be lifted away with a strip of tape pressed and peeled off the fabric, a lint roller, or your fingers — picking at them with the seam ripper’s point risks the same accidental catches you were avoiding while removing the seam. A quick check under good light confirms no stray threads or small nicks were left behind before you move on to resewing.
Common Mistakes
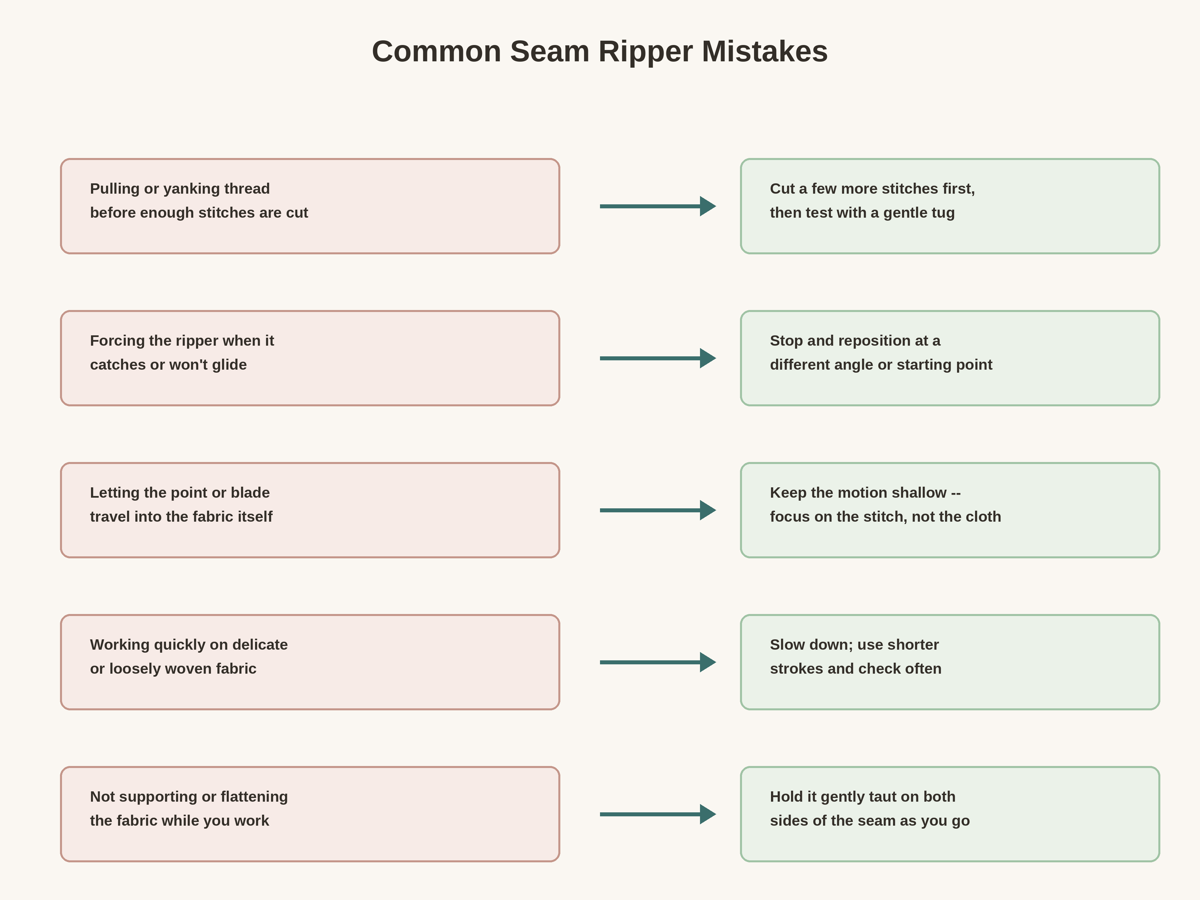
A few habits account for most of the accidental fabric damage beginners run into with a seam ripper:
| Mistake | Why It Causes Damage | What To Do Instead |
|---|---|---|
| Pulling or yanking thread before enough stitches are cut | Forces the fabric to stretch or pucker, and can strain the weave around the stitches still holding | Cut a few more stitches first, then test with a gentle tug |
| Forcing the ripper when it catches or won’t glide | The tool tends to skip off the stitch and into the fabric instead | Stop and reposition at a different angle or starting point |
| Letting the point or blade travel into the fabric itself, not just the thread | Even a small slip nicks or cuts the weave | Keep the motion shallow and stay focused on the stitch, not the cloth beneath it |
| Working quickly on delicate or loosely woven fabric | These fabrics catch and tear more easily than sturdy, tightly woven ones | Slow down, use shorter strokes, and check your progress often |
| Not supporting or flattening the fabric while you work | Loose, bunched fabric lets the tool wander off the seam line | Hold the fabric gently taut on both sides as you go |
Getting Started
A seam ripper is one of the tools covered in Essential Sewing Tools for Beginners, and this technique comes up often — undoing a bad hem, opening a seam to fix it properly, or removing an old zipper are all repairs that start with taking stitches out cleanly before anything new goes back in.