Author: Mendrya Editorial Team

  • How to Choose Thread for Clothing Repairs

    How to Choose Thread for Clothing Repairs

    A spool of thread doesn’t come with instructions, and most of what’s printed on the label — a fiber name, a number, a color code — doesn’t mean much if you’ve never had a reason to think about it before. For most repairs, one all-purpose thread handles the job without any of this mattering. This guide covers when that’s true, when it isn’t, and how to read enough of a thread label to make a confident choice.

    What’s Actually Printed on a Thread Label
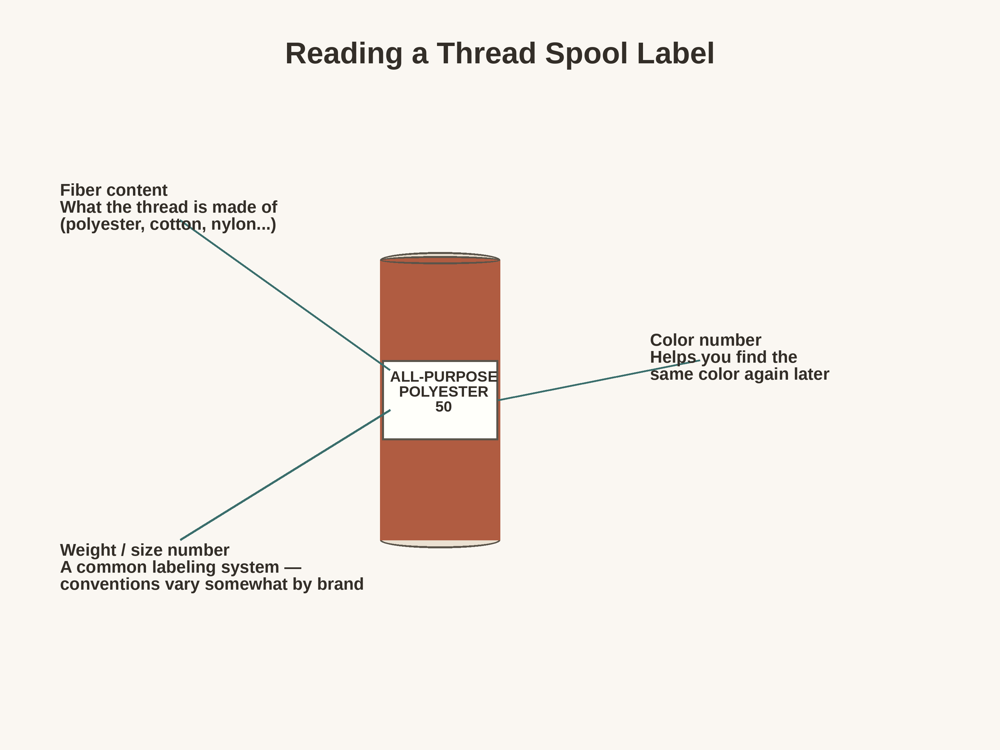
    Diagram of a thread spool labeled with callouts pointing to the fiber content, the weight or size number, and the color number printed on the label.

    Fiber content. This tells you what the thread is made of — most commonly polyester, cotton, nylon, or silk. Polyester is the most common choice for general clothing repair because it has some stretch and holds up well on most modern fabrics, including blends.

    Weight or size number. Many spools are labeled with a number, but that number doesn’t mean the same thing on every spool. A few different labeling systems are used across the thread industry — some (like the common “weight” or “wt” system) use a higher number for a thinner thread, while others (like Tex) use a higher number for a thicker one. Because of this, a number on one spool isn’t reliably comparable to a number on another unless you know which system both are using. For most repairs, this level of detail doesn’t matter — the fiber content and a rough sense of “thin, medium, or thick” from looking at the spool are usually enough to decide.

    Color number. This is mainly useful for buying the same color again later, or for finding a matching bobbin thread if you later use a machine. It doesn’t tell you anything about the thread’s thickness or fiber content.

    Which Thread for Which Repair

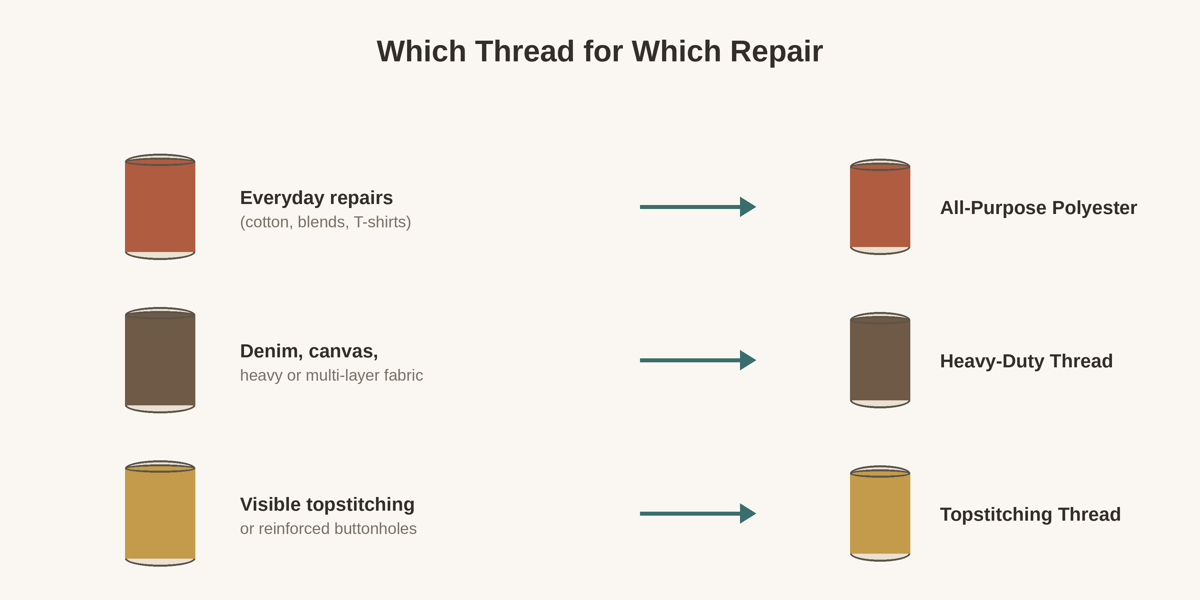
    All-purpose polyester thread is the right default for most repairs — buttons, seams, hems, and small holes on everyday clothing like cotton shirts, blends, and knits. If you only buy one type of thread, this is it.

    Heavy-duty or upholstery thread is thicker and stronger, and it’s worth reaching for on denim, canvas, or a repair with several layers of heavy fabric stacked together — a standard all-purpose thread can work there too, but it’s more likely to be the first thing that gives out under repeated stress, like at the knee of a pair of jeans.

    Cotton thread is a reasonable choice when you specifically want a natural fiber to match a 100% cotton garment, though polyester thread also performs well on cotton fabric for everyday repairs — this is more a matter of preference than a strict technical requirement.

    Silk thread is fine and strong for its thickness, and some people prefer it for repairing delicate silk fabric or for basting (temporary stitching you plan to remove later), since it tends to leave less of a mark when pulled out. It’s not necessary for most beginner repairs.

    Topstitching or buttonhole thread is noticeably thicker and used for visible, decorative stitching or for reinforcing a buttonhole. It generally won’t fit through the eye of a standard fine sewing needle — you’ll want a needle with a larger eye to match it.

    Elastic thread is a specialty product used for shirring (gathering fabric with stretchy rows of stitching) rather than general repair. It’s not something a beginner needs for typical clothing repair work.
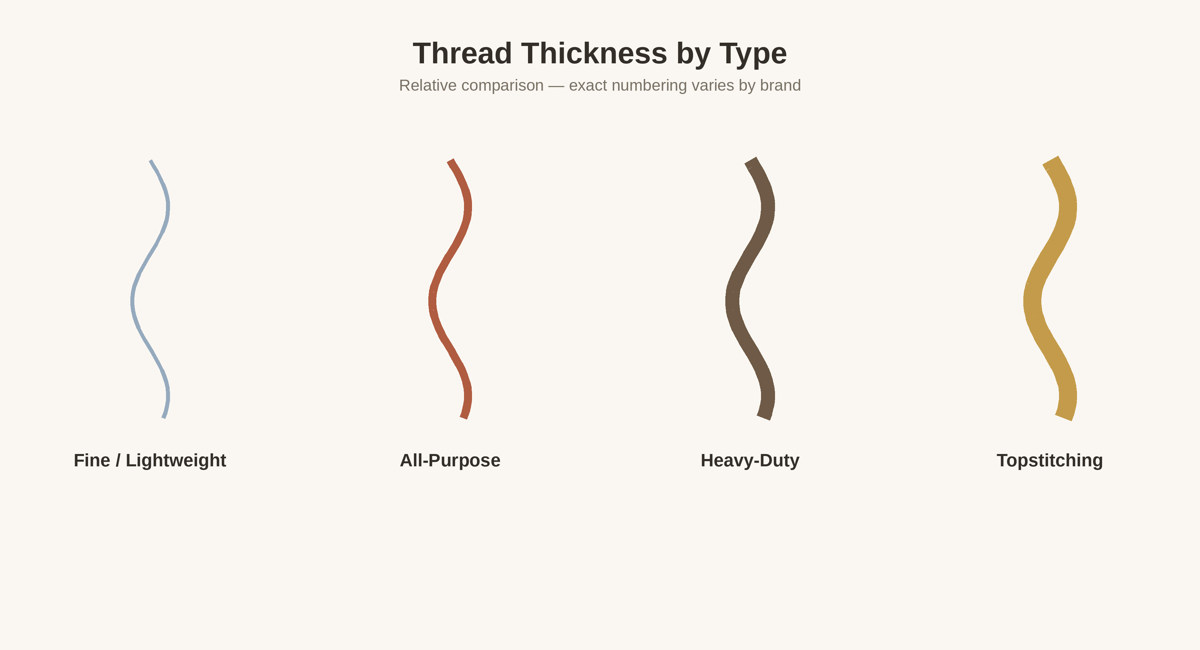
    Comparison of relative thread thickness across four types: fine lightweight thread, all-purpose thread, heavy-duty thread, and topstitching thread.

    Matching Color When You Don’t Have an Exact Match

    Finding the exact original thread color isn’t always possible. A commonly used rule of thumb is to choose a shade slightly darker than the fabric rather than lighter, since a repair in thread that’s too light tends to stand out more than one that’s a shade too dark. It’s worth holding the spool directly against the fabric in the same light you’ll be sewing in, since thread color can look different under store lighting than at home.

    For a repair where blending in matters most, an invisible (monofilament) thread is another option — a very fine, translucent nylon or polyester thread designed to blend into a wide range of fabric colors. It has real limitations worth knowing about: it can feel stiffer than regular thread, some beginners find it more frustrating to work with by hand, and it can be damaged by a hot iron, so it’s not the ideal first choice while you’re still getting comfortable with basic stitching.
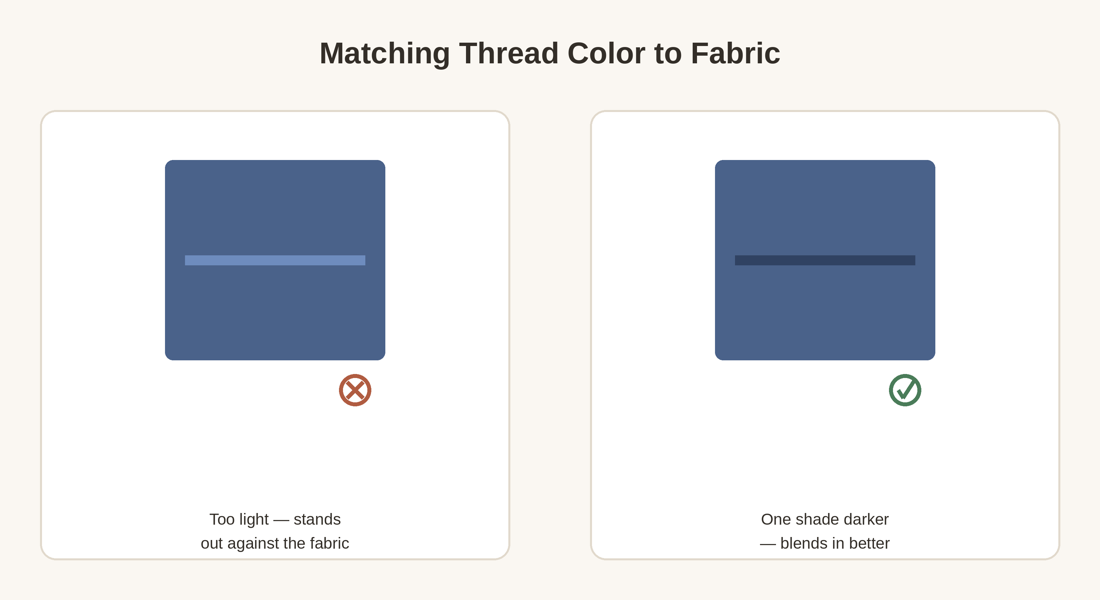
    Side-by-side comparison of thread color matched against fabric: a too-light thread that stands out, next to a thread one shade darker that blends in.

    Quick Reference

    Thread Type Best For Beginner Note
    All-purpose polyester Most everyday repairs on cotton, blends, and knits Your default — buy this first
    Heavy-duty / upholstery Denim, canvas, heavy or multi-layer fabric Stronger under repeated stress
    Cotton 100% cotton garments, by preference Not required — polyester works too
    Silk Delicate silk fabric, basting Optional for most beginner repairs
    Topstitching / buttonhole Visible decorative stitching, reinforced buttonholes Needs a needle with a larger eye
    Invisible (monofilament) Repairs where blending in matters most Can be stiff; avoid high heat from an iron
    Elastic thread Shirring stretchy rows into fabric Not for general clothing repair

    Common Mistakes

    Decision chart matching repair type — everyday repairs, heavy fabric, or visible topstitching — to the recommended thread type.

    Using a thread that’s too thin or weak for the fabric and stress it needs to handle is one of the most common reasons a repair fails again quickly — a thin all-purpose thread on a heavily stressed seam, like a jeans knee, is a common example. The opposite problem shows up as thread that’s too thick to fit through your needle’s eye, which can lead to forcing it through in a way that frays the thread or damages the eye.

    Old thread that’s been sitting in a kit for years, especially if it’s been exposed to sunlight or humidity, can weaken and become more likely to snap while you’re mid-repair. If a thread breaks unexpectedly and easily during normal use, it’s worth testing a fresh spool before assuming the problem is your technique.

    Getting Started

    For most first repairs, a spool of all-purpose polyester thread in a close-enough color is all you need. From there, How to Choose a Sewing Needle and How to Thread a Needle cover the remaining two decisions before your first stitch.
  • How to Choose a Sewing Needle for Hand Sewing

    How to Choose a Sewing Needle for Hand Sewing

    An assorted needle pack usually holds eight to twelve needles that all look nearly identical, with no explanation of which one is for what. For most repairs, the difference between them matters less than the packaging suggests — but for a few common situations, picking the wrong one can bend the needle, damage the fabric, or make the repair harder than it needs to be.

    This guide covers what actually varies between hand sewing needles, which one to reach for based on your fabric and task, and when the difference is worth paying attention to at all.

    What Actually Makes One Needle Different From Another

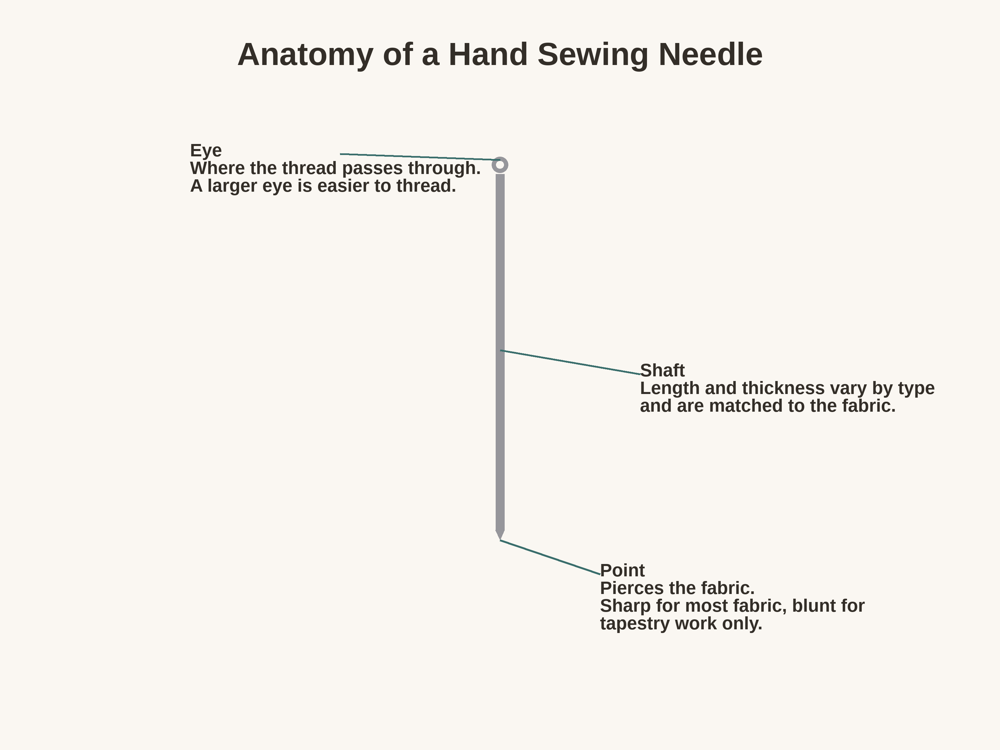
    Labeled diagram of a hand sewing needle showing the eye, shaft, and point.

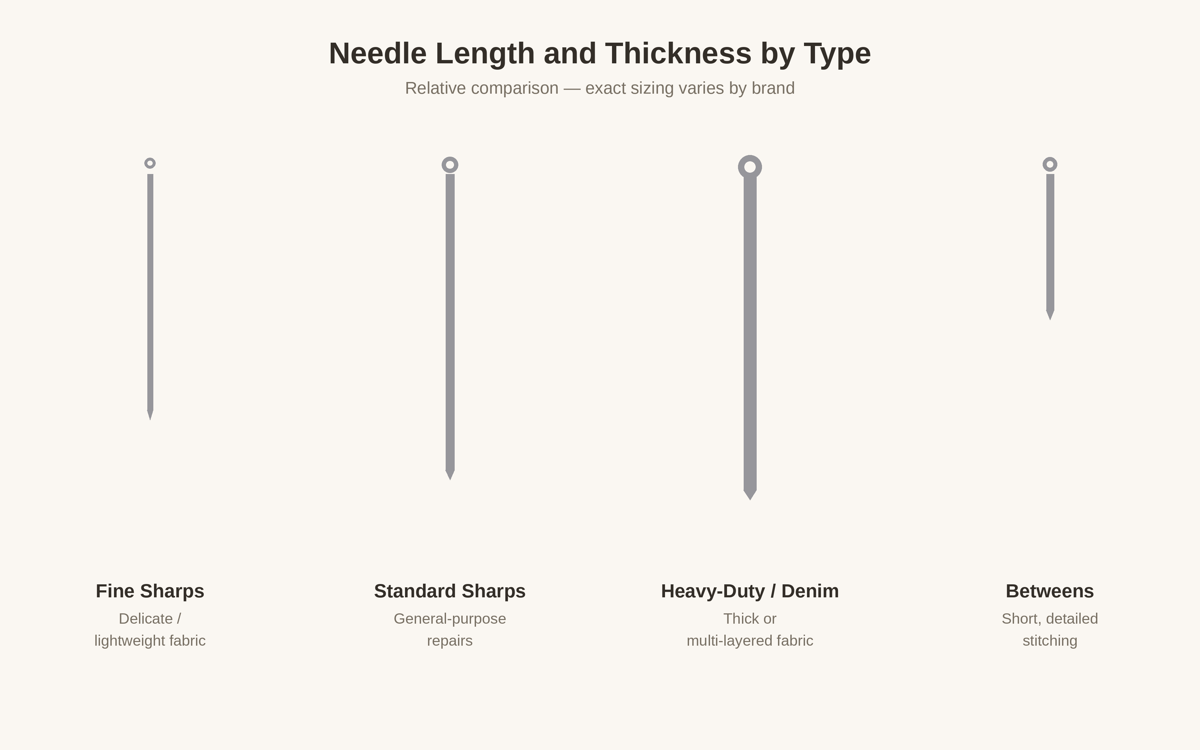
    Length and thickness. Needle packs are typically labeled with a size number, and on most brands a higher number means a shorter, thinner needle. A size 10 sharp, for example, is generally finer than a size 5. This numbering convention is common but not perfectly standardized across every manufacturer, so it’s worth treating the number as a relative guide rather than an exact measurement you can compare between brands.

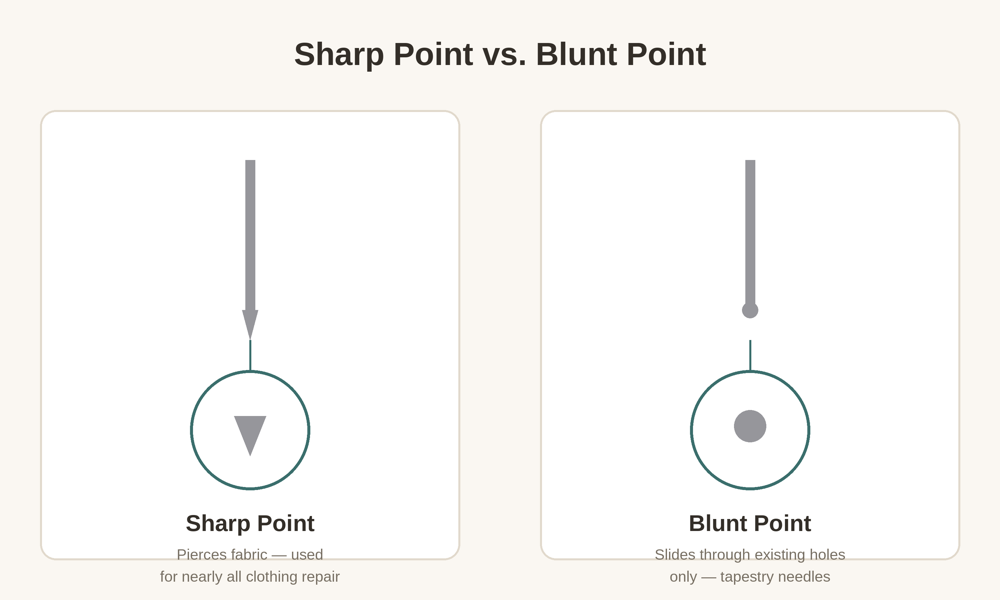
    Point shape. Most needles sold for garment repair have a sharp, piercing point, which works well on woven fabrics like cotton or denim. Knit fabric — a T-shirt, a sweater, jersey material — is a partial exception: a sharp point can pierce and weaken the yarns a knit is made of, which can lead to a small run or hole forming later, especially on loosely knit or stretchy fabric. Many needle packs include a ballpoint (sometimes labeled “jersey”) needle for this reason — its rounded tip is designed to slide between the yarns of a knit rather than piercing through them. A standard sharp needle can still work on sturdier knits, like a thick sweatshirt, without much issue, but a ballpoint needle is generally the safer choice on stretchier or more loosely knit fabric when you have one available. Separately, a tapestry needle has a fully blunt, rounded tip meant only for stitching through the existing holes of even-weave fabric or embroidery — unlike a ballpoint needle, it isn’t designed to move through the fabric itself at all, and won’t work for standard clothing repair.

    Eye size. The eye is the hole the thread passes through. A larger eye is easier to thread and can accommodate thicker thread, like embroidery floss, but it also means a slightly larger hole in the fabric where the needle passes through. For most repairs done with regular sewing thread, this trade-off doesn’t matter much — it becomes relevant mainly when you’re deciding between a standard needle and an embroidery needle for the same fabric.

    Which Needle for Which Fabric or Task

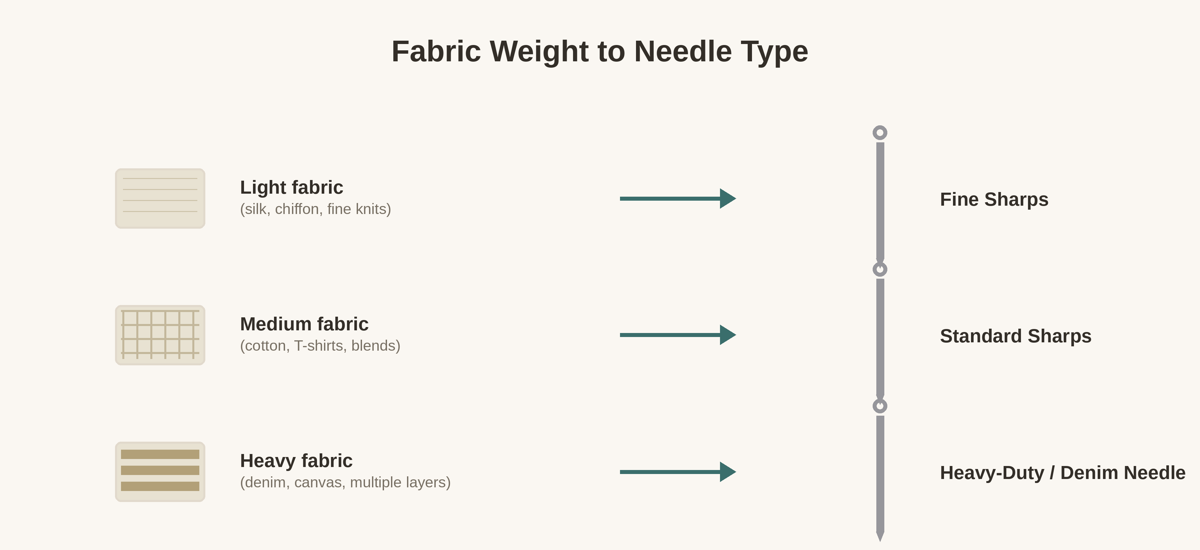
    For most beginners, one mid-range “sharps” needle — the general-purpose type included in almost every needle pack — handles the majority of repairs: buttons, small holes, seams, and hems on typical clothing like cotton shirts, T-shirts, and lightweight pants. A few situations call for something different.

    Lightweight or delicate woven fabric, like silk or chiffon, generally does better with a thinner sharp needle. A thicker needle can leave a small visible hole or pull threads out of place in fabric this light, especially if you have to pass it through the same spot more than once.

    Knit fabric, like a T-shirt or sweater, is a separate case from woven fabric, for the reason described above — a ballpoint needle, when you have one, reduces the risk of piercing and weakening the yarns as you stitch, which matters most on stretchy or loosely knit material.

    Heavy or multi-layered fabric, like denim, canvas, or a folded hem with several layers of fabric stacked together, can bend or resist a standard thin needle. A slightly thicker, sturdier needle (sometimes labeled for denim or upholstery use) is easier to push through and less likely to bend under pressure.

    Buttons usually work fine with a standard sharps needle, though some people find a slightly longer needle easier to maneuver through both the button’s holes and the fabric underneath, especially on a thicker garment like a coat.

    Detailed or closely spaced stitching, such as fine hand-finishing work, is often easier with a shorter needle (labeled “betweens” or “quilting” needles), since a shorter needle gives you more control over small, even stitches.

    Thicker decorative thread, like embroidery floss used for a visible repair or decorative patch stitching, needs a needle with a larger eye — a standard sharps needle’s eye is usually too narrow for floss to pass through without fraying.

    Side-by-side comparison of needle length and thickness across four needle types: fine sharps, standard sharps, a heavy-duty denim needle, and a short betweens needle.
    Decision chart matching fabric weight — light, medium, or heavy — to the recommended needle type.

    Needle Types at a Glance

    Needle Type Best For Point / Eye Note Skip Unless
    Sharps (general purpose) Most everyday repairs on cotton, blends, lightweight-to-medium fabric Medium point, medium eye This is your default — no reason to skip it
    Fine sharps (higher size number) Silk, chiffon, and other lightweight woven fabric Thin, minimizes visible holes You’re working with lightweight or delicate woven fabric
    Ballpoint / jersey needle Knit fabric — T-shirts, sweaters, jersey material Rounded tip slides between yarns instead of piercing them You’re working with knit or stretch fabric and have one available
    Heavy-duty / denim needle Denim, canvas, multiple folded layers Thicker, more rigid shaft You’re repairing thick or multi-layered fabric
    Embroidery / crewel needle Visible stitching with embroidery floss Larger eye for thicker thread You’re not using embroidery floss or similar thick thread
    Betweens (quilting needle) Short, closely spaced hand-finishing stitches Shorter shaft for control You’re not doing fine detail or quilting-style stitching
    Leather / glover’s needle Leather, vinyl, suede Wedge-shaped point, not for woven fabric You’re not repairing leather or a similar material
    Tapestry needle Even-weave fabric holes, cross-stitch Blunt tip — does not pierce fabric Not usable for standard clothing repair

    Common Mistakes When Choosing or Using a Needle

    Close-up comparison of a sharp needle point, which pierces fabric, next to a blunt tapestry needle point, which does not.

    Using a needle that’s too thick for the fabric is one of the most common beginner mistakes — it can leave small holes or pulled threads in delicate material that are hard to undo once they’re there. The opposite mistake, using a needle that’s too thin for heavy fabric, usually shows up as the needle bending or resisting so much that the stitching becomes slow and frustrating.

    A needle that’s bent, has a dull point, or has developed a slight burr (a rough spot you can sometimes feel by running the needle across a fingernail) can snag the fabric, resist smoothly piercing it, or slip out of your fingers unexpectedly. If a needle feels like it’s fighting you more than it should, it’s often the needle rather than your technique — trying a fresh one from the pack is a reasonable first troubleshooting step before assuming you’re doing something wrong.

    When to Replace a Needle

    Needles are inexpensive enough that there’s little reason to keep using one once it’s bent, visibly dull, or discolored with rust or tarnish. A compromised needle can be harder to control and, since it’s no longer moving smoothly through the fabric, more likely to slip and prick a finger than a needle in good condition. Most needle packs come with enough needles that replacing one that’s past its useful life doesn’t mean buying a whole new pack.

    Getting Started

    If you’re not sure where to begin, a mid-size sharps needle from a basic assorted needle pack is the right default for most first repairs. From there, How to Choose Thread for Clothing Repairs and How to Thread a Needle cover the next two decisions you’ll need to make before your first stitch.

  • Essential Sewing Tools for Beginners: What You Actually Need to Start

    Essential Sewing Tools for Beginners: What You Actually Need to Start

    You don’t need a full sewing kit to fix a button, patch a hole, or hem a pair of pants. A small, inexpensive set of tools covers almost every repair a beginner runs into, and most of what gets bundled into “complete” sewing kits at the store sits unused for months, if it ever gets used at all.

    This list covers what actually earns a place in a beginner’s toolbox, what to look for when you buy it, and what you can safely skip until you have a specific reason to need it.

    The Core Tools You Need for Almost Any Repair

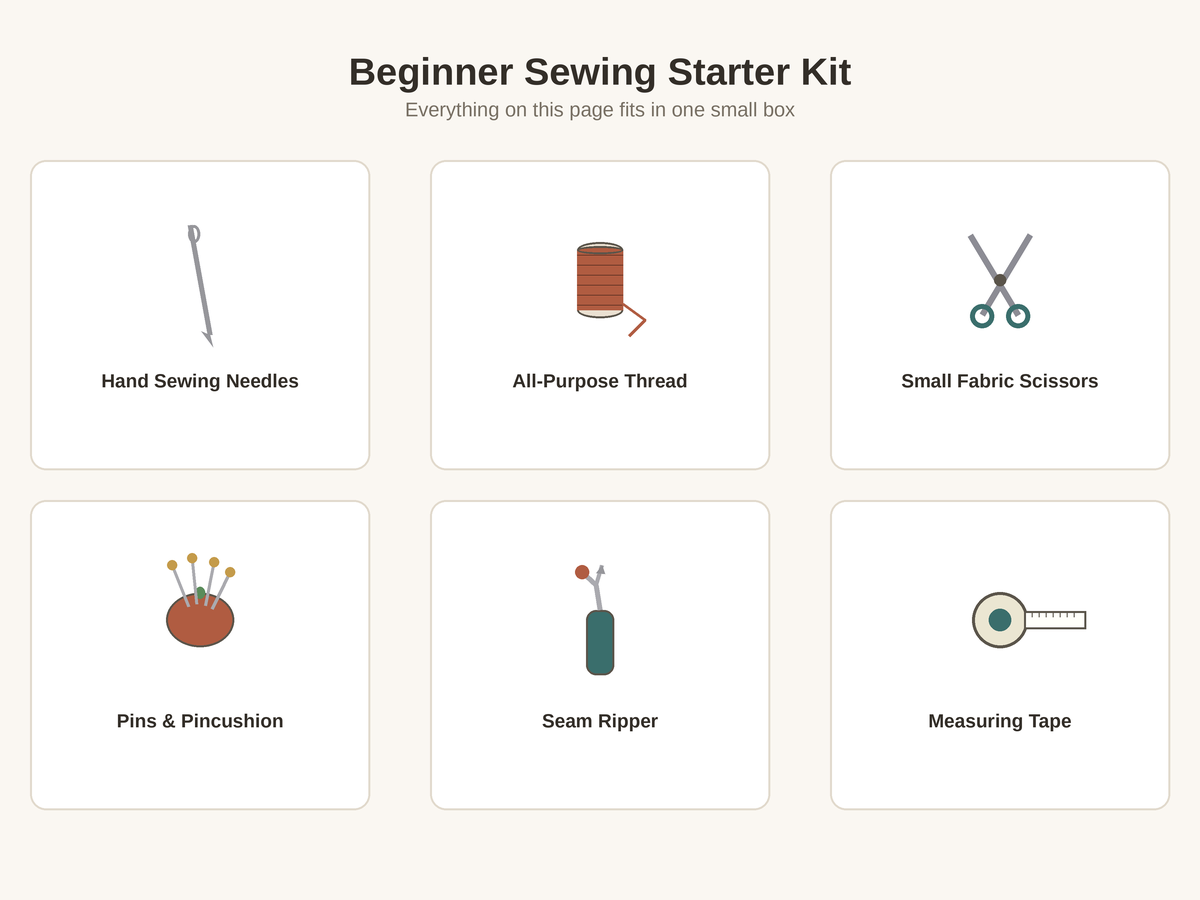
    Flat-lay illustration of a beginner sewing kit, including hand needles, thread, small fabric scissors, straight pins in a pincushion, a seam ripper, and a flexible measuring tape.

    Hand sewing needles. You’ll want a small assorted pack rather than a single needle, since the right needle depends on the fabric and the repair. A pack labeled “sharps” or “assorted household needles” covers most everyday clothing repairs. How to Choose a Sewing Needle goes into which needle to grab for which job — for now, an assorted pack is all you need to buy.

    Thread. All-purpose polyester thread handles the vast majority of clothing repairs, including most cotton, denim, and blended fabrics. Buy one or two neutral colors to start (black, white, or gray) plus any color that matches clothing you already plan to fix. How to Choose Thread for Clothing Repairs explains when a different thread type matters more.

    Fabric scissors. Look for a small pair with 4- to 5-inch blades — long enough to cut cleanly through fabric, short enough to control for detail work like trimming close to a seam or snipping a thread. A pointed tip is more versatile than a blunt one, since you’ll sometimes need to get into a tight corner, but it also means being careful not to catch the fabric underneath what you’re cutting. The single most common mistake is using fabric scissors on paper “just this once” — paper dulls the blades fast, and dull scissors crush and fray fabric instead of cutting it cleanly. If you only own one pair, keep it fabric-only and use kitchen scissors or a utility knife for anything else.

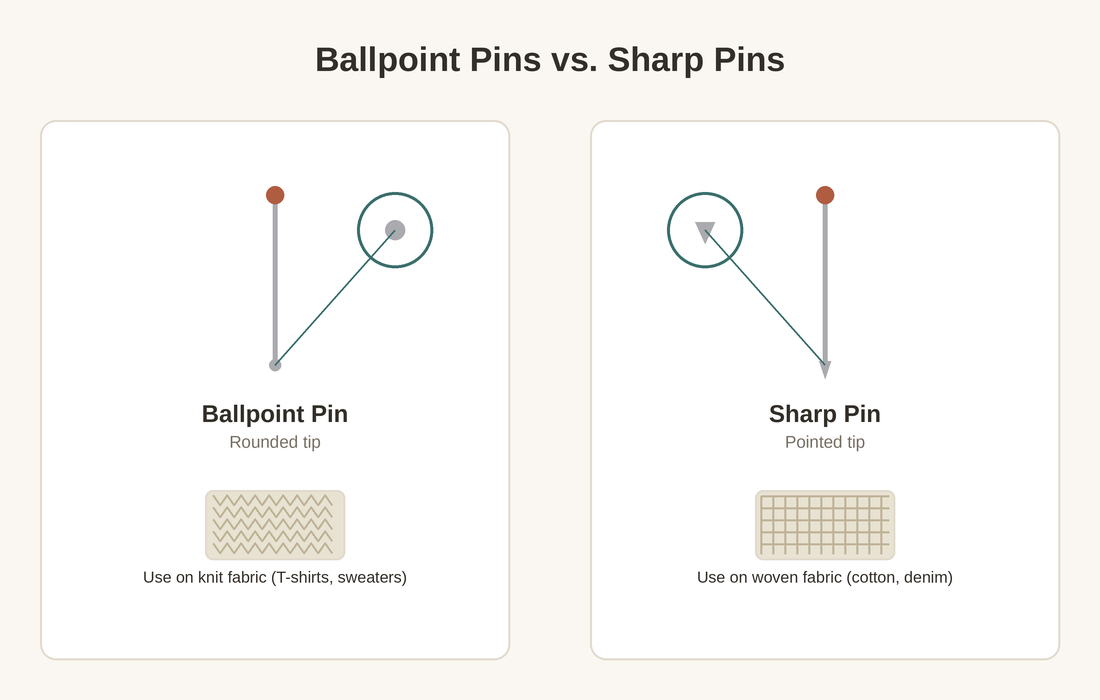
    Straight pins and a pincushion. Pins hold fabric in place while you work — folding a hem, aligning a patch, or keeping a torn edge closed before you stitch it. Pin type actually matters here: regular sharp pins work fine on wovens like cotton or denim, but they can snag and distort knit fabrics like a T-shirt or sweater, where ballpoint pins (rounded rather than sharp at the tip) slide between the fibers instead of piercing them. Glass-head or metal-head pins can handle direct contact with a hot iron without melting, which matters for hemming, since plastic pin heads can melt onto fabric if you press over them. A common beginner mistake is under-pinning — using two or three pins on a long hem lets the fabric shift out of place while you sew, so it’s usually worth using more pins than feels necessary at first.

    Diagram comparing a rounded ballpoint pin tip, used on knit fabric, with a sharp pin tip, used on woven fabric.

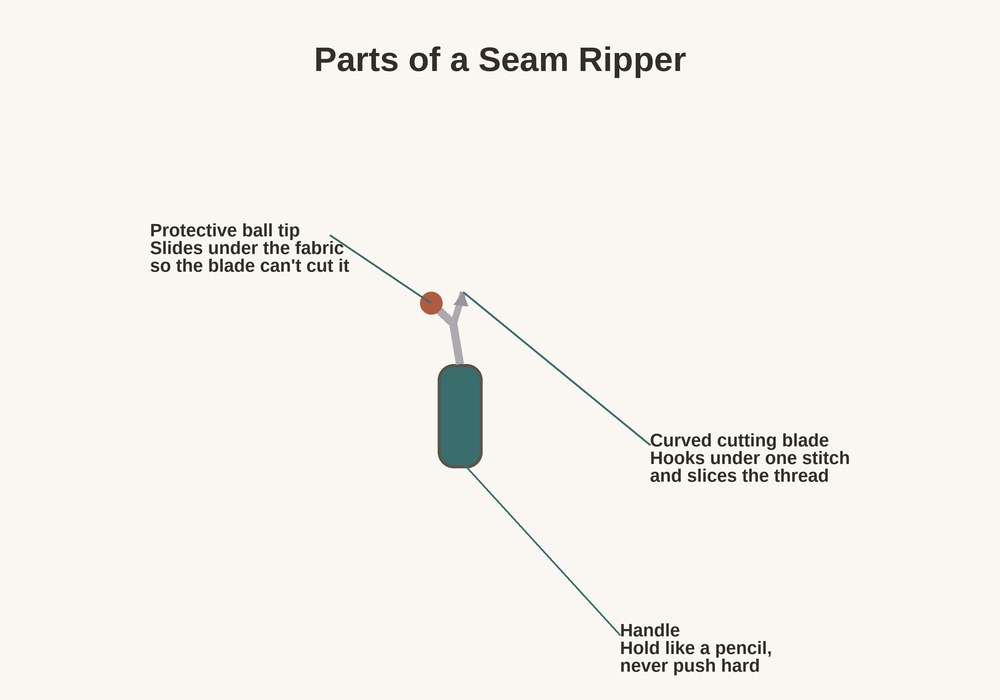
    A seam ripper. This small tool removes stitching without cutting into the fabric underneath — useful for fixing a repair you got wrong, opening a seam to fix it properly, or removing an old button or patch. It looks simple but is easy to misuse if you’re not careful. How to Use a Seam Ripper Without Damaging Fabric covers how to use one safely.

    Close-up diagram of a seam ripper labeling the curved cutting blade and the small round protective tip.

    A measuring tape. Use a flexible fabric or fiberglass measuring tape, not a rigid ruler or yardstick. Flexibility is the whole point: it needs to follow the curve of a pant leg for hemming, wrap around a sleeve, or measure the length of a tear that isn’t perfectly straight. Look for one marked clearly in inches with fraction lines (like eighths), since garment measurements are rarely round numbers. A rigid ruler can work for measuring something flat, like a patch you’re cutting, but it will give you an inaccurate hem length if the garment tapers or curves — a mistake that’s easy to make if a flexible tape isn’t on hand.

    A thimble (optional, but worth trying). Pushing a needle through thick or multiple layers of fabric — a denim hem, a folded seam allowance, a patch over heavy canvas — can hurt your fingertip, and a thimble on your pushing finger (usually the middle finger) protects it. For light, single-layer repairs, like fixing a small hole in a T-shirt, you can usually skip it without any trouble. Fit matters more than most beginners expect: a thimble that’s too loose spins around or falls off, and one that’s too tight is uncomfortable enough that people give up on it after one try and assume thimbles “just don’t work” for them. If that happens, trying a different size before giving up entirely is worth it.

    Quick Reference: What to Buy Now

    Tool Needed Now? Main Use Beginner Note
    Hand sewing needles Yes Push thread through fabric Buy an assorted pack, not a single size
    Thread Yes Holds the repair together Start with one or two neutral colors
    Fabric scissors Yes Cuts fabric and thread cleanly Best reserved for fabric and thread — cutting paper can dull the blades faster
    Straight pins + pincushion Yes Hold fabric in place before stitching Ballpoint pins for knits, regular pins for wovens
    Seam ripper Yes Removes stitching without cutting fabric Easy to nick fabric if you rush
    Measuring tape Yes Measuring hems, tears, and patches Best for hems, curves, and body measurements — a rigid ruler still works for flat, straight measurements
    Thimble Optional Protects your fingertip on thick fabric Skip it for light, single-layer repairs
    Rotary cutter and mat No, skip for now Cutting fabric for new garments Not needed to repair clothes you already own
    Embroidery hoop and floss No, skip for now Decorative embroidery stitching Not a structural repair tool
    Bias tape maker No, skip for now Finishing raw edges on garments made from scratch A construction tool, not a repair tool

    What Beginners Don’t Need Yet

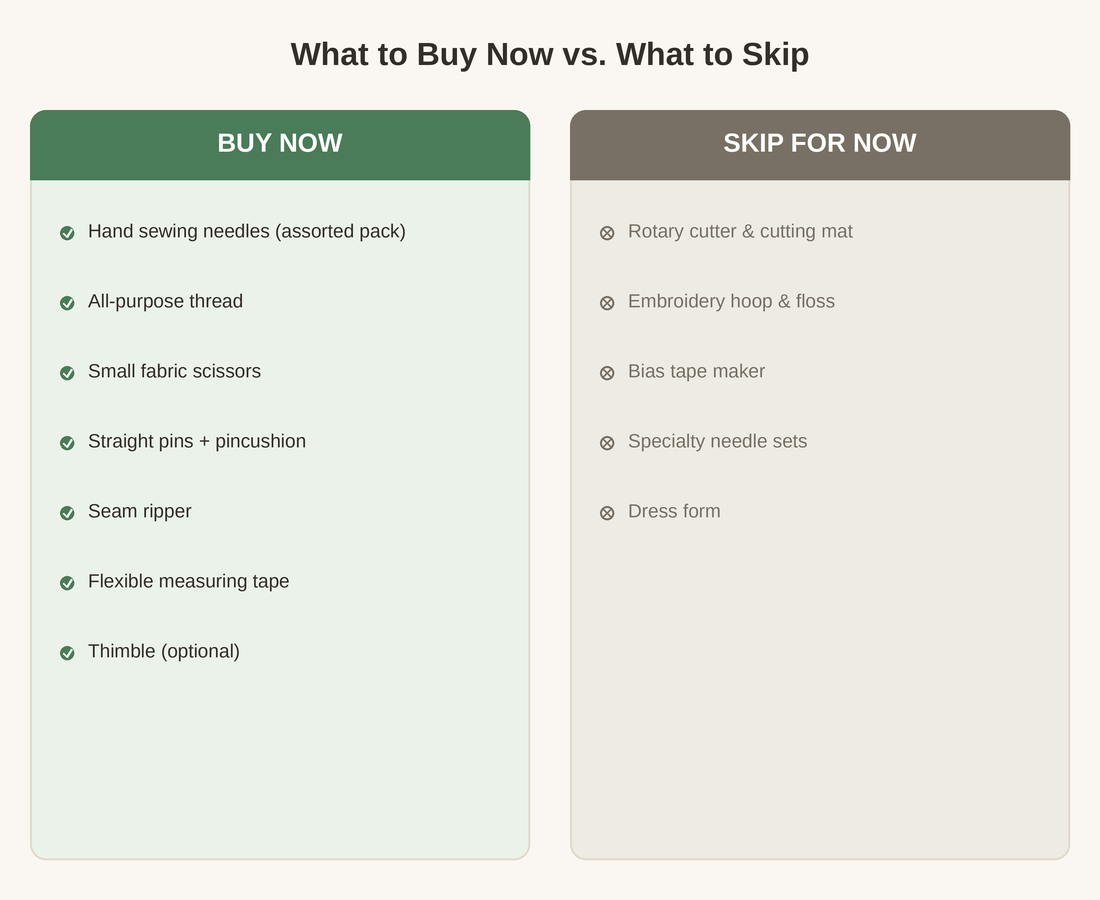
    Pre-packaged “beginner sewing kits” often include a lot of items that make sense for garment construction or craft projects but don’t do much for someone repairing clothes at home. It’s fine to skip these until a specific project actually calls for them:

    • A rotary cutter and cutting mat — useful for cutting fabric for new garments or quilting, not for repairing something you already own
    • An embroidery hoop and embroidery floss — for decorative stitching, not structural repairs
    • Bias tape or a bias tape maker — a construction tool for finishing raw edges on garments you’re making from scratch
    • A full range of specialty needles (leather, embroidery, upholstery) — buy these individually later if a specific repair calls for them
    • Fabric marking pens or chalk in multiple colors — one basic marking tool is enough until you’re doing more detailed work
    • A dress form — genuinely useful for some sewing projects, not something a beginner repairing clothes needs
    Two-column comparison graphic showing beginner sewing tools to buy now, such as needles and a seam ripper, next to tools to skip for now, such as a rotary cutter and embroidery hoop.

    Buying a large kit up front can actually work against you: it’s harder to find the two or three tools you use constantly when they’re buried among a dozen you don’t.

    Where to Buy Beginner Sewing Tools (and What to Avoid)

    Fabric and craft stores carry individual tools as well as pre-packaged kits. Buying pieces separately doesn’t guarantee a lower price — that depends on the retailer and the kit — but it does let you put your money into the tools you’ll actually use often, like scissors and needles, instead of paying for a dozen extras that come bundled into a kit and never get touched. Pharmacies and general retailers often sell small “sewing kit” tins meant for travel or emergency repairs — they’re fine in a pinch, but the needles, thread, and scissors inside tend to be lower quality and not meant for regular use.

    If you’re not sure where to spend a little more, scissors and needles are the two items worth prioritizing, since dull blades and bent or overly thick needles make almost every repair harder than it needs to be. Thread, pins, and a seam ripper can be perfectly inexpensive without causing problems.

    Setting Up a Small Space to Sew In

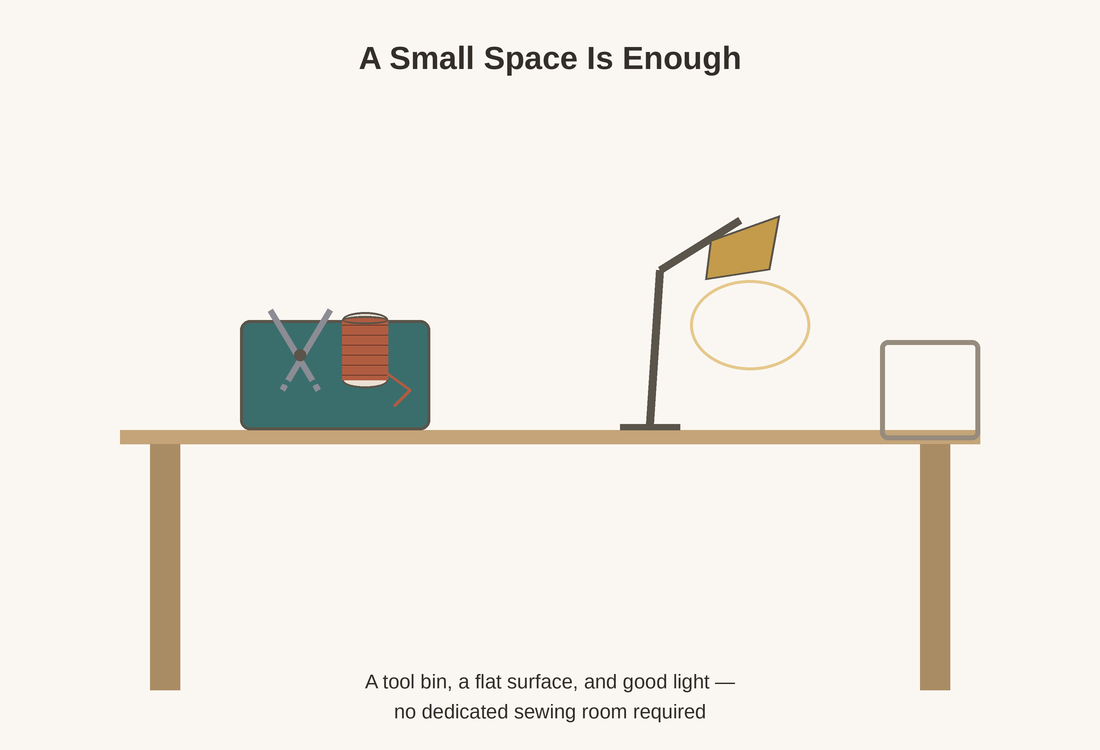
    Illustration of a small at-home sewing space with a tool storage bin, a flat table surface, and a desk lamp, showing no dedicated sewing room is needed.

    You don’t need a dedicated sewing room, or even a permanent table. A small bin, box, or zippered pouch to keep your tools together, a flat surface to work on (a table or a lap desk both work), and good light are really all that matter. Bright, direct light — natural daylight or a strong desk lamp — makes it much easier to see a needle’s eye, follow your stitch spacing, and catch a crooked line before it’s too late to fix easily.

    What to Do With This Kit

    Once you have these basics together, the next steps are picking the right needle and thread for your first repair, then learning how to thread a needle and secure your stitches so they don’t come loose. From there, sewing a button back on is usually the easiest real repair to start with — it uses almost every tool on this list and takes only a few minutes once you know the steps.