This is for a machine that’s already set up and understood but is now misbehaving while you’re actually trying to sew — jamming, thread bunching or nesting underneath the fabric, thread breaking, or stitches skipping. It’s not a second walkthrough of setup, threading, or parts — How to Thread a Sewing Machine and Sewing Machine Parts and What They Do cover that ground, and quite a bit of what causes jamming traces back to threading, so it’s worth having those in mind here rather than repeated. What follows is a sensible order to work through, not a single universal cause — these problems have several common sources, and which one applies to your situation depends on the machine and what’s actually going on.
A Sensible Order to Check Things In
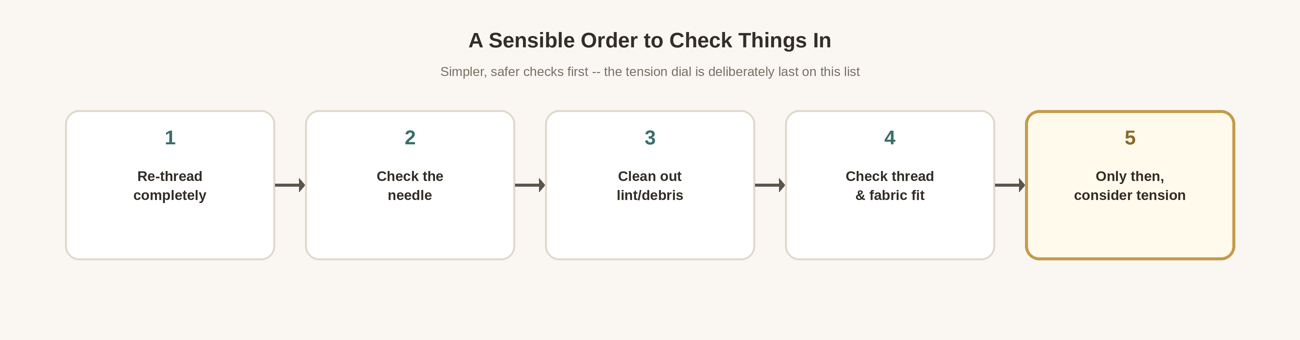
It’s tempting to reach for the tension dial first, since it feels like the most direct explanation for uneven or bunched stitching. It’s worth resisting that instinct: tension is genuinely one of the last things to check, not the first, because a handful of simpler, safer things cause the same symptoms far more often and are easier to rule out. Working through re-threading, the needle, lint, and thread-and-fabric fit first — roughly in that order — resolves a lot of jamming before tension ever needs to enter the picture.
Start by Re-Threading Completely
A skipped guide, thread that isn’t properly seated in the tension area, a missed take-up point, or a bobbin that isn’t threaded or inserted quite right can all produce jamming or bunching that looks tension-related but isn’t. Rather than trying to spot the one specific thing that’s off, it’s often faster to unthread both the top and the bobbin completely and re-thread from scratch, slowly and deliberately. The full logic of this is covered in How to Thread a Sewing Machine — this is the single most common fix for jamming, and it costs nothing to try first.
A Damaged Needle Causes More Problems Than It Looks Like

A needle that’s bent, dull, or has developed a small burr is a common and easy-to-overlook cause of jamming, skipped stitches, and repeated thread breaks — and it’s one of the simplest things to rule out. If a needle looks even slightly bent, or has been sewing for a long time, or recently hit a pin, replacing it is the right move rather than trying to straighten it back out and reuse it — a needle that’s been bent once can flex unpredictably, strike the needle plate, or throw off the stitch in ways that are easy to misread as a different problem entirely. Needles are inexpensive, and turning the machine off before changing one, as with any time your hands are near the needle area, is worth doing as a habit.
Lint and Debris in the Bobbin Area

Lint and small bits of thread build up around the bobbin over time, and enough of it can interfere with how thread feeds or even physically jam the mechanism. Machines often include a small brush for exactly this, and clearing this area out periodically — not just when something’s already gone wrong — is a reasonable habit. How you access this area varies by machine, so this is another point where the manual is the right reference rather than guessing at how a cover or plate comes off.
Thread and Fabric That Don’t Quite Match
A needle or thread that doesn’t suit the fabric can cause skipped stitches or breakage that has nothing to do with tension, threading, or the needle’s condition. Old, poor-quality, or overly fine thread can fray or snap under normal tension; a needle that’s too fine for a heavier fabric, or too heavy for a delicate one, can struggle in ways that look like a jam. If you’ve recently switched fabrics or thread and the trouble started around the same time, that’s worth treating as a real lead rather than a coincidence.
Where the Loops Show Up: A Clue, Not a Law

You may have heard that loops showing up on top of the fabric point to the upper threading or tension, while loops on the underside point to the bobbin — and there’s some truth to it as a general tendency. It’s worth treating as a clue that narrows where to look next, not as a reliable rule you can diagnose from on its own. Plenty of machines and situations don’t follow it cleanly, so it’s best used alongside the other checks above rather than in place of them.
If Tension Still Seems Like the Issue
If you’ve worked through re-threading, the needle, lint, and thread-and-fabric fit and stitching still looks consistently too loose or too tight, the tension dial itself may genuinely be worth adjusting — small changes, tested on scrap fabric, one direction at a time. What’s not worth doing is opening up a bobbin case and adjusting the small tension screw some of them have: it’s easy to move it further from correct than it started, it’s difficult to reset accurately without a reference point, and it’s rarely actually the source of the problem. If adjusting the main tension dial doesn’t resolve things, that’s a reasonable point to stop and have the machine looked at rather than continuing to experiment.
If You Smell Burning or See Smoke
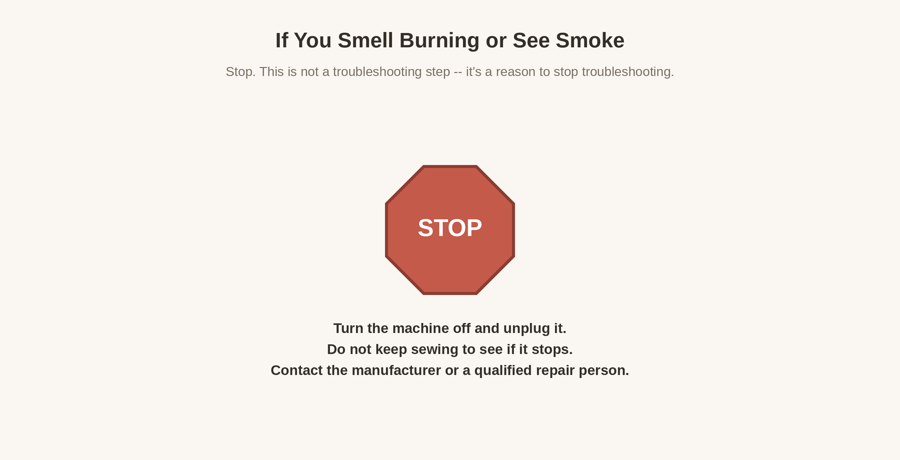
This isn’t a troubleshooting step — it’s a reason to stop troubleshooting. Turn the machine off and unplug it, and don’t keep sewing to see whether it resolves on its own. This calls for the manufacturer or a qualified repair person, not a fix attempted at home.
The same caution applies to the handwheel: if it meets real resistance when you try to turn it, stop rather than forcing it. Forcing a jammed mechanism can bend or break parts that are expensive or difficult to repair, and a handwheel that won’t turn easily is itself worth having looked at by someone qualified.
Quick Diagnostic Reference
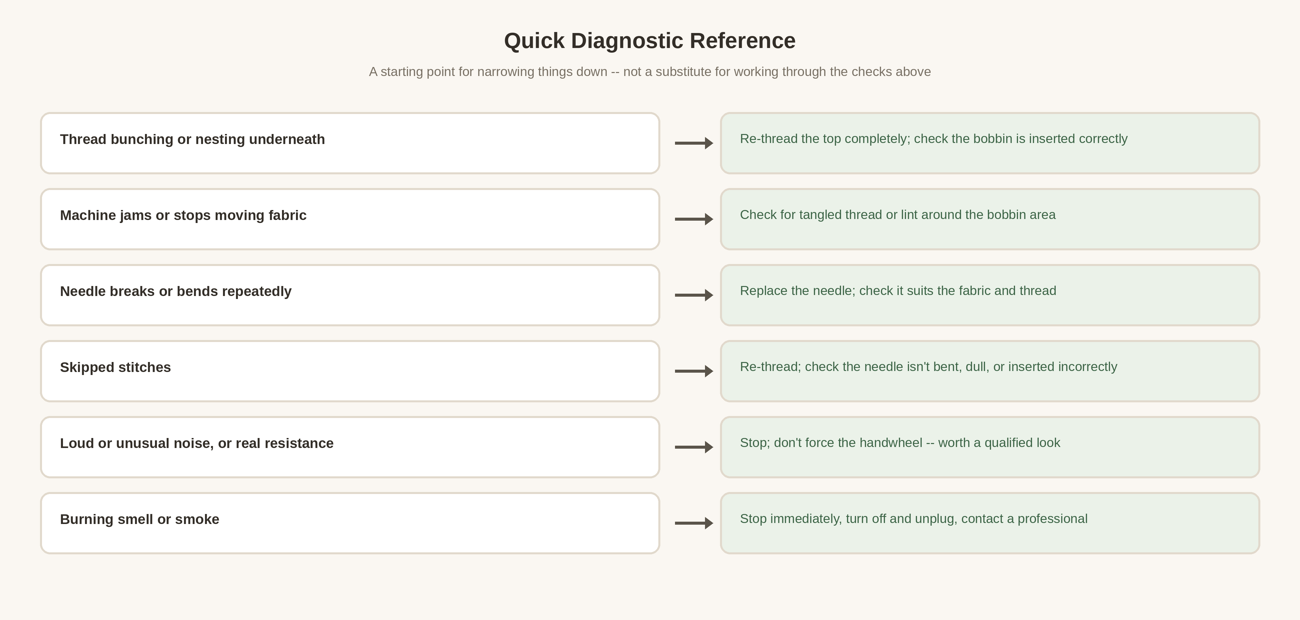
This is a starting point for narrowing things down, not a substitute for working through the checks above — but it’s a reasonable place to look first if you want a quick sense of where to start.
When to Call in a Professional
If you’ve worked through re-threading, the needle, lint, thread-and-fabric fit, and even a careful tension check, and the problem persists — especially if it comes with unusual noise, real resistance, or anything that feels mechanical rather than thread-related — that’s a reasonable point to stop and have someone qualified take a look rather than continuing to experiment. Some problems, like timing issues inside the machine, are genuinely beyond what’s safe or practical to diagnose and fix yourself, and there’s nothing wrong with recognizing that point and stopping there.