An assorted needle pack usually holds eight to twelve needles that all look nearly identical, with no explanation of which one is for what. For most repairs, the difference between them matters less than the packaging suggests — but for a few common situations, picking the wrong one can bend the needle, damage the fabric, or make the repair harder than it needs to be.
This guide covers what actually varies between hand sewing needles, which one to reach for based on your fabric and task, and when the difference is worth paying attention to at all.
What Actually Makes One Needle Different From Another
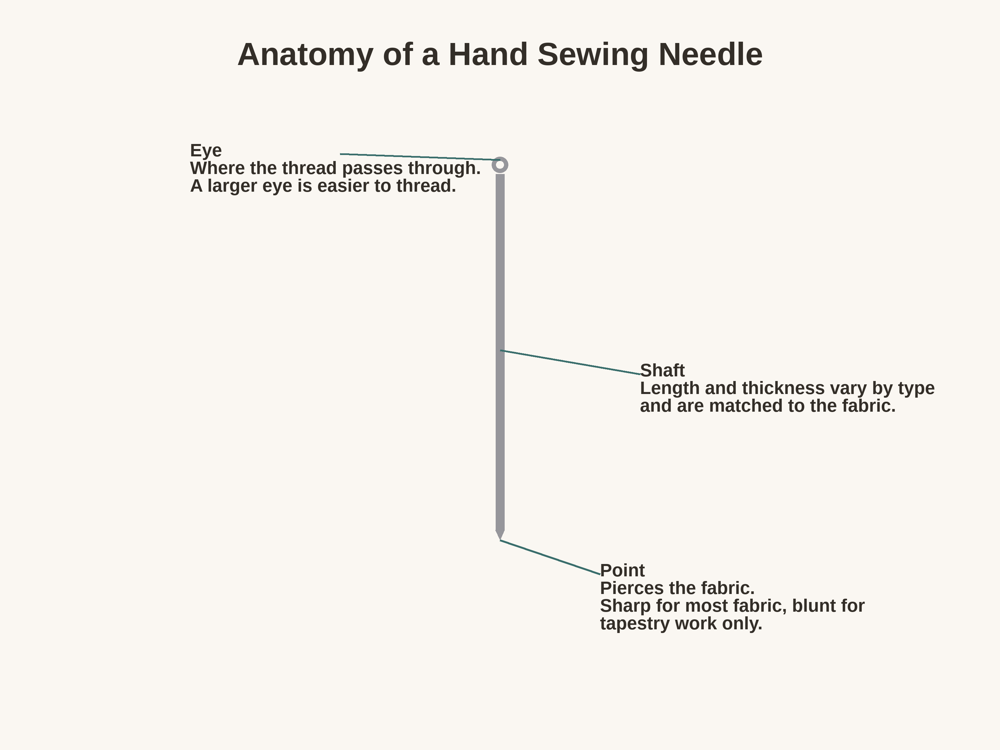
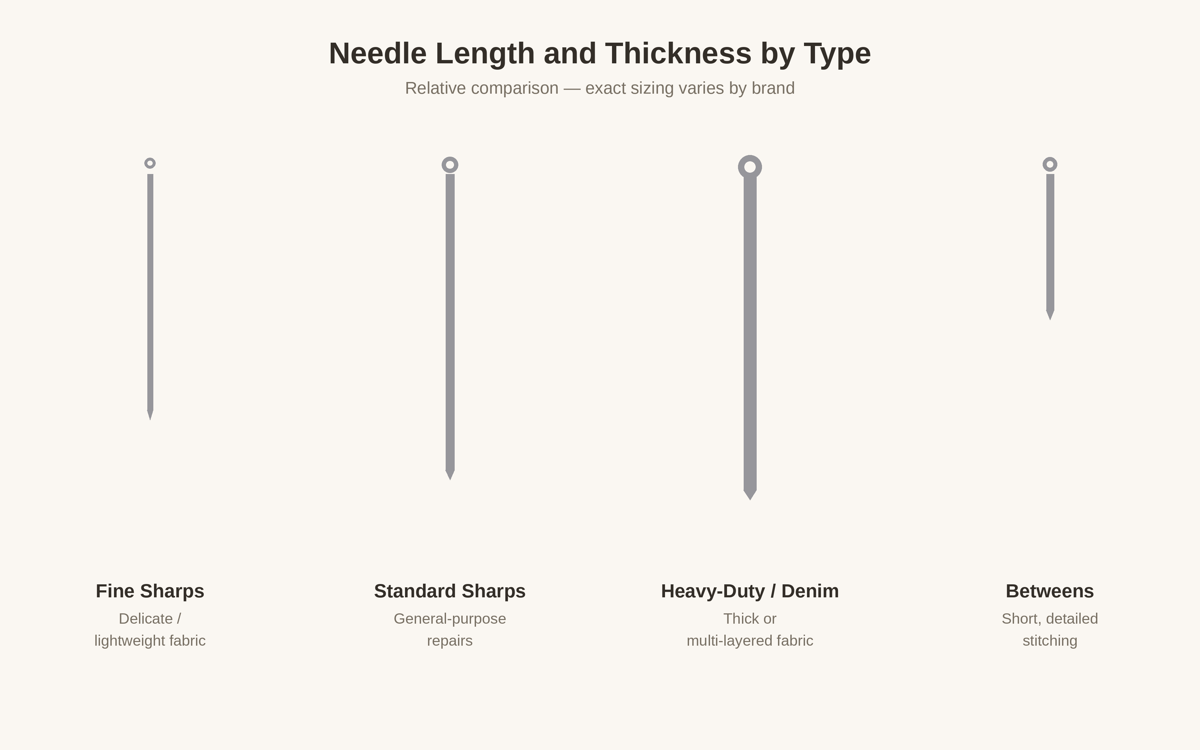
Length and thickness. Needle packs are typically labeled with a size number, and on most brands a higher number means a shorter, thinner needle. A size 10 sharp, for example, is generally finer than a size 5. This numbering convention is common but not perfectly standardized across every manufacturer, so it’s worth treating the number as a relative guide rather than an exact measurement you can compare between brands.
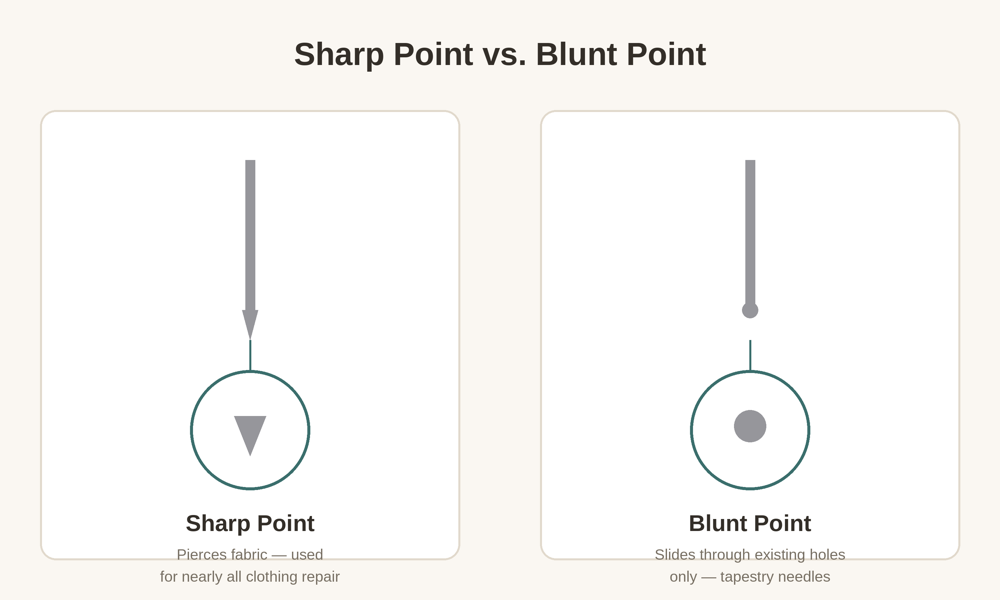
Point shape. Most needles sold for garment repair have a sharp, piercing point, which works well on woven fabrics like cotton or denim. Knit fabric — a T-shirt, a sweater, jersey material — is a partial exception: a sharp point can pierce and weaken the yarns a knit is made of, which can lead to a small run or hole forming later, especially on loosely knit or stretchy fabric. Many needle packs include a ballpoint (sometimes labeled “jersey”) needle for this reason — its rounded tip is designed to slide between the yarns of a knit rather than piercing through them. A standard sharp needle can still work on sturdier knits, like a thick sweatshirt, without much issue, but a ballpoint needle is generally the safer choice on stretchier or more loosely knit fabric when you have one available. Separately, a tapestry needle has a fully blunt, rounded tip meant only for stitching through the existing holes of even-weave fabric or embroidery — unlike a ballpoint needle, it isn’t designed to move through the fabric itself at all, and won’t work for standard clothing repair.
Eye size. The eye is the hole the thread passes through. A larger eye is easier to thread and can accommodate thicker thread, like embroidery floss, but it also means a slightly larger hole in the fabric where the needle passes through. For most repairs done with regular sewing thread, this trade-off doesn’t matter much — it becomes relevant mainly when you’re deciding between a standard needle and an embroidery needle for the same fabric.
Which Needle for Which Fabric or Task
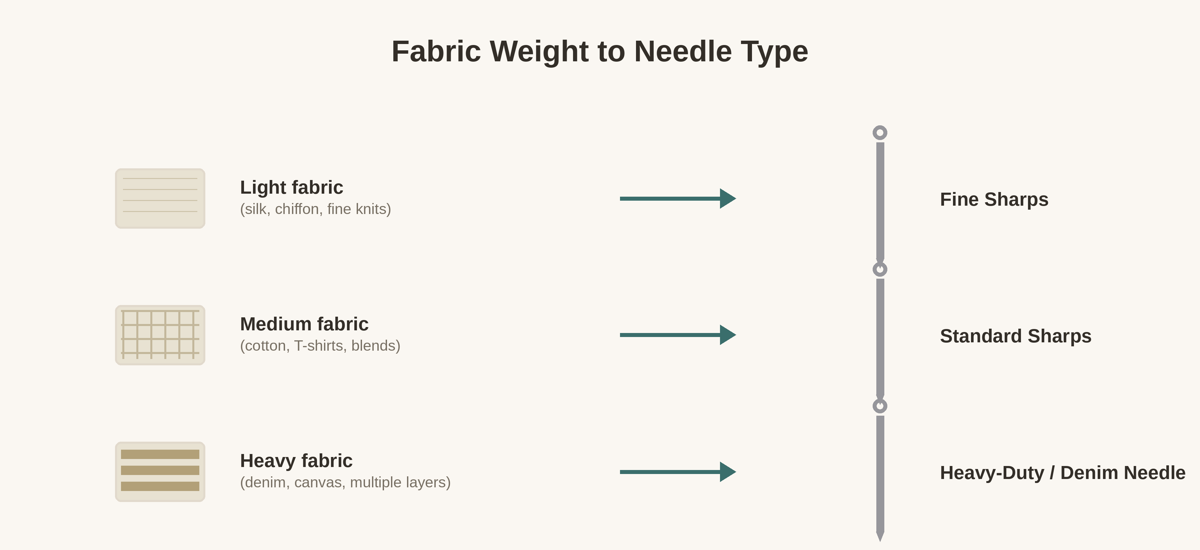
For most beginners, one mid-range “sharps” needle — the general-purpose type included in almost every needle pack — handles the majority of repairs: buttons, small holes, seams, and hems on typical clothing like cotton shirts, T-shirts, and lightweight pants. A few situations call for something different.
Lightweight or delicate woven fabric, like silk or chiffon, generally does better with a thinner sharp needle. A thicker needle can leave a small visible hole or pull threads out of place in fabric this light, especially if you have to pass it through the same spot more than once.
Knit fabric, like a T-shirt or sweater, is a separate case from woven fabric, for the reason described above — a ballpoint needle, when you have one, reduces the risk of piercing and weakening the yarns as you stitch, which matters most on stretchy or loosely knit material.
Heavy or multi-layered fabric, like denim, canvas, or a folded hem with several layers of fabric stacked together, can bend or resist a standard thin needle. A slightly thicker, sturdier needle (sometimes labeled for denim or upholstery use) is easier to push through and less likely to bend under pressure.
Buttons usually work fine with a standard sharps needle, though some people find a slightly longer needle easier to maneuver through both the button’s holes and the fabric underneath, especially on a thicker garment like a coat.
Detailed or closely spaced stitching, such as fine hand-finishing work, is often easier with a shorter needle (labeled “betweens” or “quilting” needles), since a shorter needle gives you more control over small, even stitches.
Thicker decorative thread, like embroidery floss used for a visible repair or decorative patch stitching, needs a needle with a larger eye — a standard sharps needle’s eye is usually too narrow for floss to pass through without fraying.
Needle Types at a Glance
| Needle Type | Best For | Point / Eye Note | Skip Unless |
|---|---|---|---|
| Sharps (general purpose) | Most everyday repairs on cotton, blends, lightweight-to-medium fabric | Medium point, medium eye | This is your default — no reason to skip it |
| Fine sharps (higher size number) | Silk, chiffon, and other lightweight woven fabric | Thin, minimizes visible holes | You’re working with lightweight or delicate woven fabric |
| Ballpoint / jersey needle | Knit fabric — T-shirts, sweaters, jersey material | Rounded tip slides between yarns instead of piercing them | You’re working with knit or stretch fabric and have one available |
| Heavy-duty / denim needle | Denim, canvas, multiple folded layers | Thicker, more rigid shaft | You’re repairing thick or multi-layered fabric |
| Embroidery / crewel needle | Visible stitching with embroidery floss | Larger eye for thicker thread | You’re not using embroidery floss or similar thick thread |
| Betweens (quilting needle) | Short, closely spaced hand-finishing stitches | Shorter shaft for control | You’re not doing fine detail or quilting-style stitching |
| Leather / glover’s needle | Leather, vinyl, suede | Wedge-shaped point, not for woven fabric | You’re not repairing leather or a similar material |
| Tapestry needle | Even-weave fabric holes, cross-stitch | Blunt tip — does not pierce fabric | Not usable for standard clothing repair |
Common Mistakes When Choosing or Using a Needle
Using a needle that’s too thick for the fabric is one of the most common beginner mistakes — it can leave small holes or pulled threads in delicate material that are hard to undo once they’re there. The opposite mistake, using a needle that’s too thin for heavy fabric, usually shows up as the needle bending or resisting so much that the stitching becomes slow and frustrating.
A needle that’s bent, has a dull point, or has developed a slight burr (a rough spot you can sometimes feel by running the needle across a fingernail) can snag the fabric, resist smoothly piercing it, or slip out of your fingers unexpectedly. If a needle feels like it’s fighting you more than it should, it’s often the needle rather than your technique — trying a fresh one from the pack is a reasonable first troubleshooting step before assuming you’re doing something wrong.
When to Replace a Needle
Needles are inexpensive enough that there’s little reason to keep using one once it’s bent, visibly dull, or discolored with rust or tarnish. A compromised needle can be harder to control and, since it’s no longer moving smoothly through the fabric, more likely to slip and prick a finger than a needle in good condition. Most needle packs come with enough needles that replacing one that’s past its useful life doesn’t mean buying a whole new pack.
Getting Started
If you’re not sure where to begin, a mid-size sharps needle from a basic assorted needle pack is the right default for most first repairs. From there, How to Choose Thread for Clothing Repairs and How to Thread a Needle cover the next two decisions you’ll need to make before your first stitch.