Squinting at a needle while a thread tip drifts past the eye is one of the more frustrating few minutes a beginner spends before they’ve sewn a single stitch — and it gets harder still if the needle’s eye is genuinely difficult for you to see. Most threading trouble comes down to a handful of fixable things: how the thread end is cut, the light and contrast you’re working in, whether the needle and thread actually fit each other, and whether you’re relying on a tool built for exactly this problem instead of just your eyesight. This guide covers all of it, including several adjustments that make threading noticeably easier if a small needle eye is hard for you to make out.
Get the Cut Right First
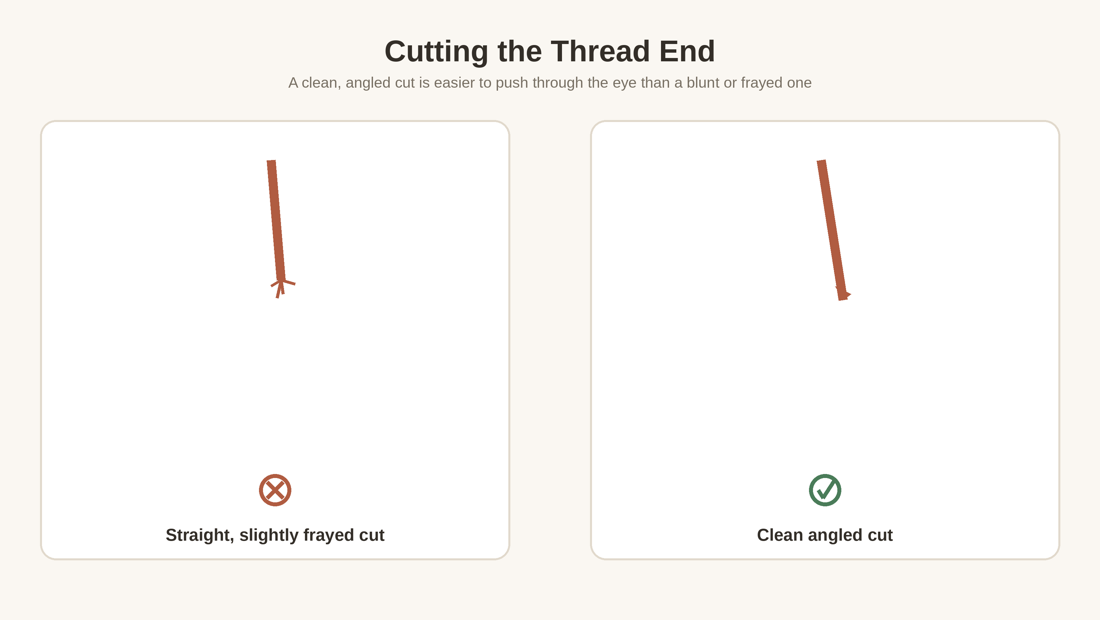
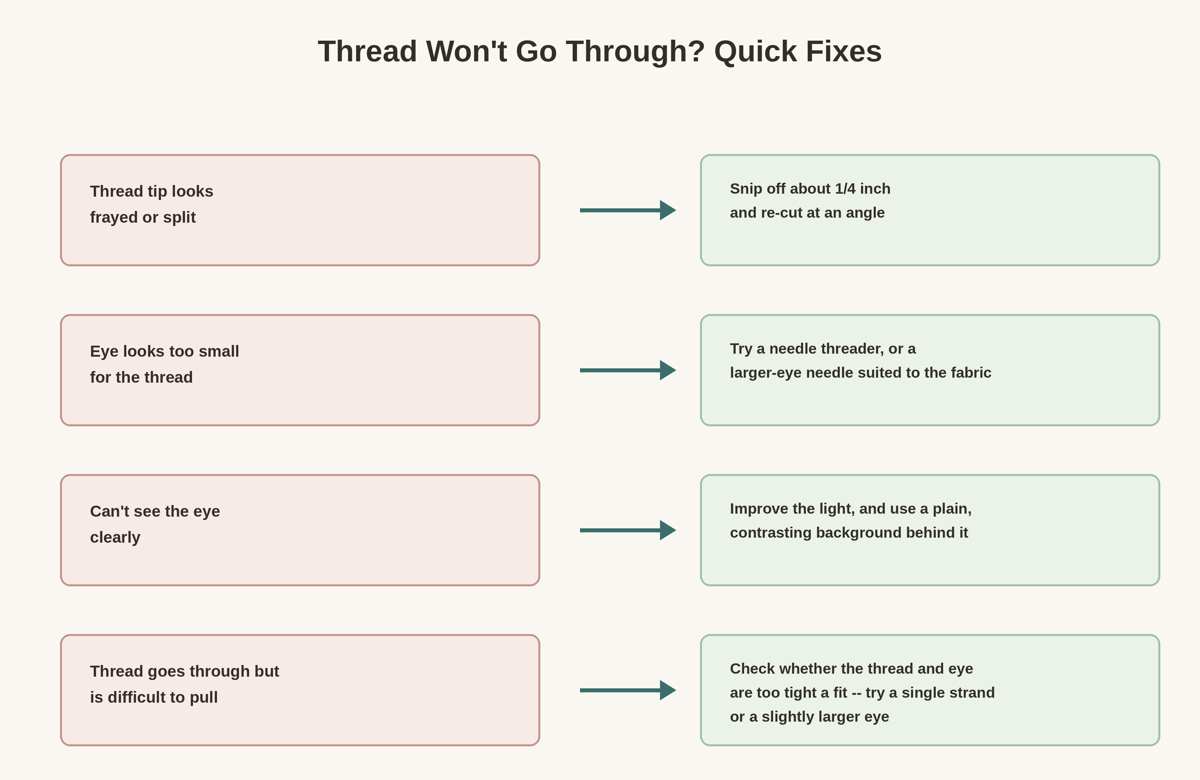
Before anything else, look at the tip of your thread. If it’s been sitting cut for a while, the fibers may have started to splay apart slightly, and a splayed tip is harder to push through a small opening than a clean one. Snipping about a quarter inch off the end with sharp scissors, at a slight diagonal rather than straight across, gives many sewers an easier time — the angled cut tapers to a narrower point than a blunt one.
Some people also moisten the very tip of the thread before threading. This can help flatten stray fibers on cotton thread, though it makes less difference on slicker threads like polyester, and it’s not a required step if your cut is already clean.
Good Light and a Background That Doesn’t Compete
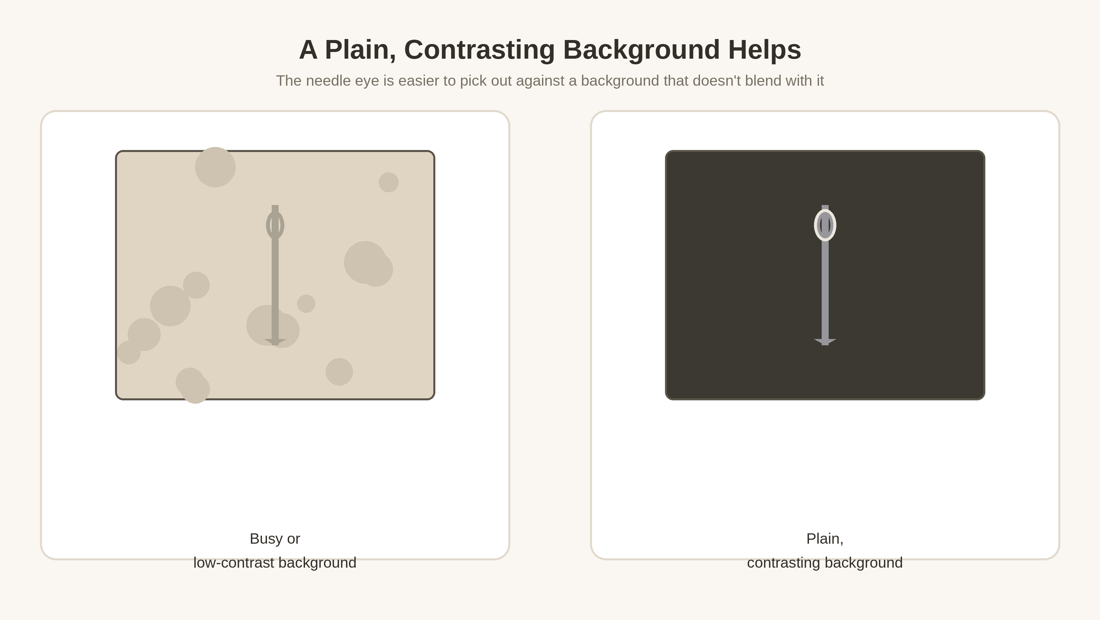
Two adjustments make the eye of the needle easier to pick out, and both are worth doing before you assume the thread or needle is the problem. First, work facing a light source rather than with it behind you — a window or lamp angled toward the needle, not toward your eyes, lights up the opening instead of leaving it in your own shadow. Second, hold the needle against a plain background that contrasts with it, rather than a patterned or similarly colored surface: a sheet of white or light-colored paper behind a dark needle, or a dark cloth behind a light one, makes the small dark oval of the eye stand out instead of blending into whatever’s behind it.
This matters for everyone threading a needle in dim light, and it matters more if the eye is genuinely hard for you to distinguish — it’s a simple change that often does more than fighting with the needle itself.
Choosing a Needle Eye You Can Actually See
Needle eye size varies by needle type, not just by chance, and it’s worth choosing deliberately rather than threading whatever needle happens to be in the pack. As covered in How to Choose a Sewing Needle for Hand Sewing, a larger eye is easier to thread and can take thicker thread, but it also means a very slightly larger hole where the needle passes through the fabric — for most repairs done with regular sewing thread, that trade-off doesn’t matter much, but it’s not nothing.
A larger eye isn’t automatically the better choice regardless of what you’re sewing — the needle attached to it still needs to suit the fabric and the repair, the same as any other needle decision. What’s usually more useful is looking within the needle types that already fit your fabric and repair, and choosing the one with the larger eye among those — an embroidery or crewel needle, for instance, is made with a larger eye than a standard sharps needle of similar size. If visibility is the main obstacle and nothing in the right category has a large enough eye to work with comfortably, a needle threader is often the more practical fix than changing needle type.
Single Strand or Doubled?
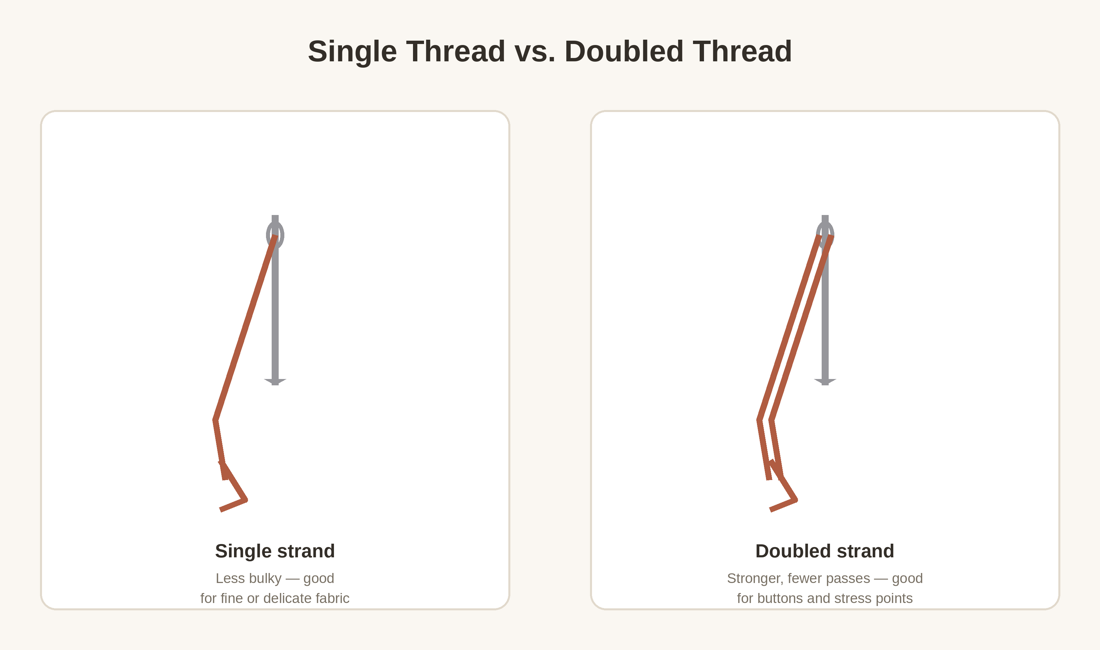
Whether to thread one strand or two depends on what you’re sewing, not a fixed rule. A single strand is less bulky and shows less, which matters for fine fabric or neat, small stitches. A doubled strand — pulling the thread through the eye until both ends meet, so you’re effectively sewing with two strands at once — tends to be stronger and means the thread makes fewer passes to reinforce something like a button, though it adds bulk and is somewhat more prone to tangling as you sew.
Doubled thread can be useful for some repairs where added reinforcement helps — certain buttons, or a seam under higher stress — while a single strand reduces bulk and can be more appropriate for finer fabric or stitching that needs to stay less visible. Neither is a general default; the better choice depends on the fabric, the repair, the thread itself, and how much bulk is acceptable for that particular stitch.
Lining the Thread Up With the Eye
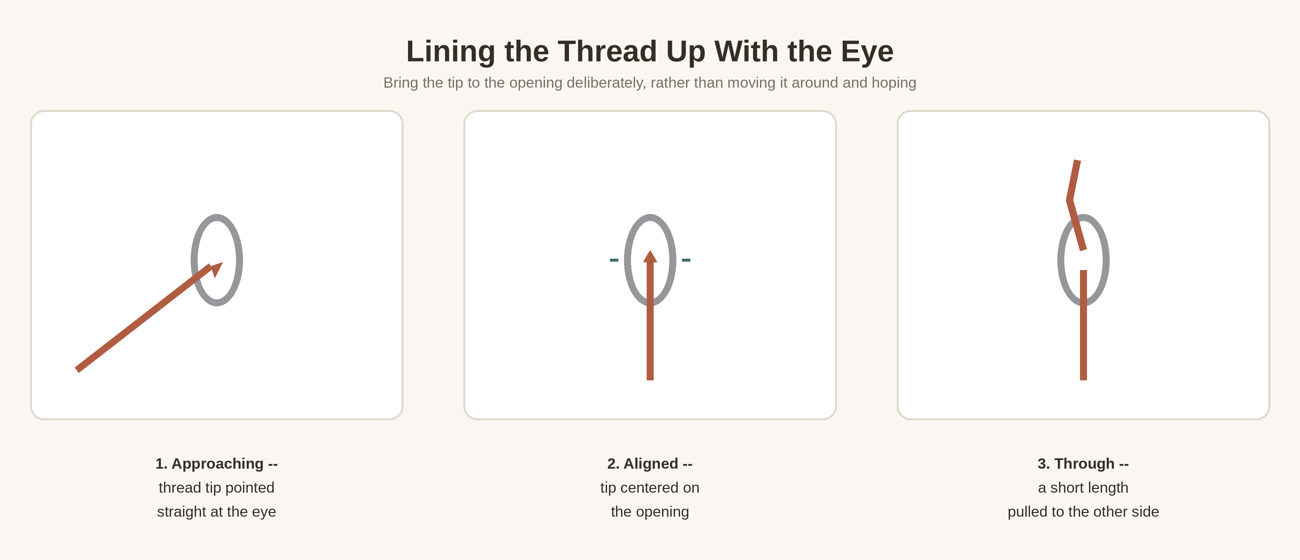
- Hold the needle steady. Grip it near the eye with your non-dominant hand, angled toward a light source rather than away from it, against the contrasting background described above.
- Hold the thread close to the tip. Pinching it about a quarter inch from the cut end, between your thumb and forefinger, keeps it from wobbling or bending as you guide it.
- Bring the tip to the opening deliberately. Point the thread straight at the eye and move it in one controlled motion toward the center of the opening, rather than moving the thread around and hoping it catches. Small, repeated stabs tend to fray the tip further and make the next attempt harder, not easier.
- Pull through and adjust. Once a bit of thread is through the eye, pull it to whatever length you need — roughly double the length of what you plan to sew, plus a few inches, is a reasonable starting point, though the right length varies with the repair.
Practical Adjustments If the Eye Is Hard to See
If you find needle eyes difficult to see regardless of light and contrast, a few practical adjustments help without requiring anything specialized: using a magnifier or reading glasses if you already find them helpful for close work, resting your hands and the needle against a stable surface rather than holding everything in the air (which cuts down on small movements that make a small target harder to hit), taking a moment between attempts instead of rushing, and leaning on the tools built for this — a needle threader, or a needle with a larger eye suited to your fabric, both covered above. None of this is about correcting your vision; it’s about removing avoidable obstacles between you and a small opening in a piece of metal, which is a genuinely hard thing to thread by sight for most people in poor conditions, not just for people who find it especially difficult.
When Threading Gets Difficult: Use a Threader
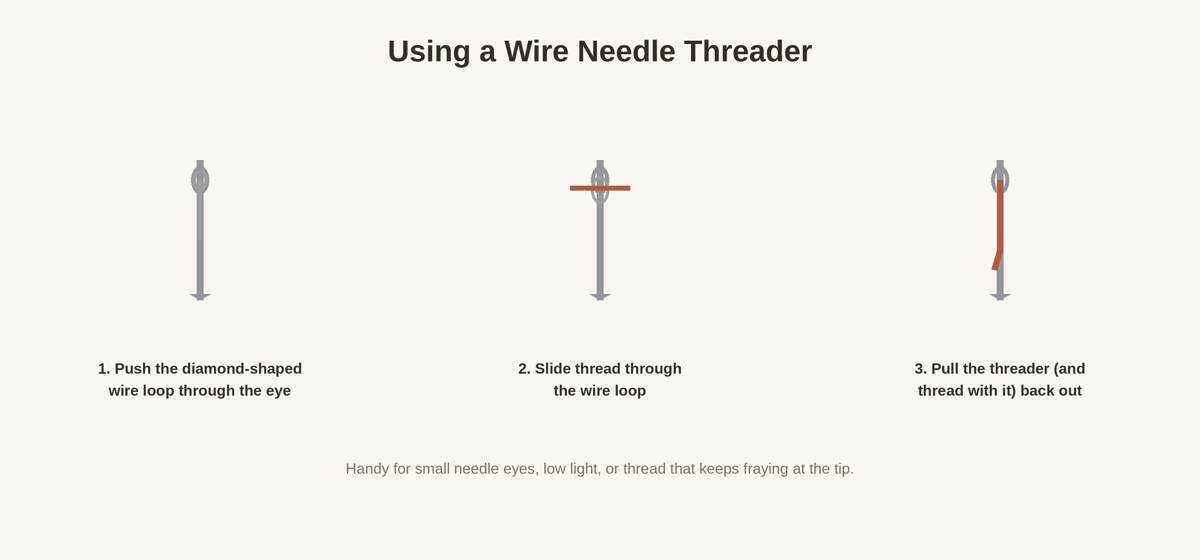
A wire needle threader is a small, inexpensive tool sold in most craft and notions sections, and it solves the problem directly rather than requiring better eyesight or steadier hands. Push the diamond-shaped wire loop through the eye of the needle, slide your thread through that wire loop, then pull the threader back out the way it came — it carries the thread through the eye with it. It’s especially useful for needles with small eyes, for low light, or for anyone who finds a particular thread keeps fraying before they can get it through.
Not every threader fits every needle and thread combination — the wire loop has to be thin enough to pass through the eye and still leave room for the thread. If a threader won’t go through a particular needle’s eye, don’t force it; the wire can bend or snap. Trying a different needle in the same category, or threading that particular needle directly using the contrast and alignment steps above, usually works better than pushing a threader that clearly doesn’t fit.
Securing the Thread
Once the needle is threaded, you’ll generally want a knot at the tail end so your first stitch doesn’t pull the thread straight back out of the fabric. If you’ve doubled the thread, tying the two loose ends together in a small knot is usually enough. If you’re working with a single strand, tie a knot near the very end of that one tail. There are a few different ways to tie a secure starting knot, and the right one can depend on the fabric and the type of repair — see How to Start and Finish Hand Sewing Without the Thread Coming Loose once you’re comfortable with the basics covered here.
Troubleshooting by Symptom
| Symptom | What to Check |
|---|---|
| Thread won’t enter the eye at all | Check the cut end for fraying, confirm the tip is actually aligned with the opening rather than beside it, improve the light and background contrast, and check whether the thread is simply too thick for this needle’s eye |
| Thread keeps fraying before it goes through | Make a fresh, clean angled cut and inspect the new tip closely — if it’s already separating again, the thread itself may be older or lower quality than ideal for hand sewing |
| Thread passes through but is difficult to pull | The thread and eye may be too tight a fit for a comfortable pull — try a single strand instead of doubled, or a needle with a slightly larger eye suited to the fabric |
| A needle threader won’t fit through the eye | Don’t force it — the threader’s wire and this needle’s eye may simply be incompatible; try threading the needle directly, or use a needle threader-compatible needle if one is available |
Getting Started
Once you can reliably get thread through the eye, the remaining setup questions are mostly answered by what you’re repairing. If you haven’t already, How to Choose a Sewing Needle for Hand Sewing and How to Choose Thread for Clothing Repairs cover picking the right needle and thread before you get to this step, and Essential Sewing Tools for Beginners covers what else is worth having on hand.