Hemming pants by hand covers two different situations, and it’s worth being clear about which one you’re actually dealing with. This article is about shortening pants to a new length and creating a hand-sewn hem from scratch — planning, measuring, folding, and stitching. If your pants already have a hem that’s simply come loose, dropped, or fallen down without you changing the length, that’s a narrower repair with less measuring and no cutting involved — How to Fix a Loose or Fallen Hem covers that repair specifically, since it’s a different, generally simpler situation than what’s covered here.
Before You Measure
Try the pants on the way you’d actually wear them, including the shoes you’re likely to wear with them if that affects the look. Stand naturally rather than on your toes or unusually straight. Mark the length you want with a pin or chalk while wearing them. It’s worth checking both legs rather than assuming one measurement from the waistband works identically for both — bodies aren’t perfectly symmetrical and garments don’t always hang identically on both sides, so comparing how the finished length actually looks on each leg is more reliable than trusting a single measurement to apply equally to both. Take the pants off before doing any pinning adjustments or cutting — working on a flat surface is safer and more accurate than trying to cut fabric while wearing the garment.
The Distinction That Matters Most
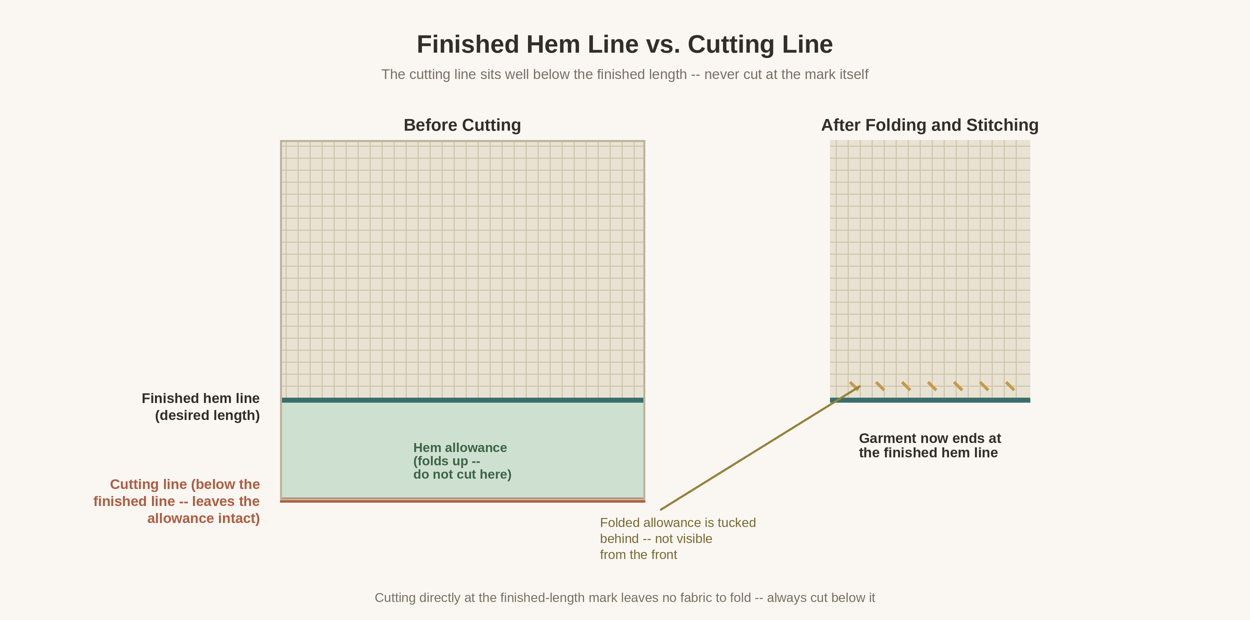
The finished hem line is where the bottom edge of the pants will end up once you’re done. The cutting line is not the same thing — it sits below the finished hem line, leaving extra fabric (the hem allowance) that folds up underneath to create the hem. Cutting directly at your desired-length mark leaves no fabric to fold, and that mistake can’t be undone. There’s no single hem allowance that’s correct for every pair of pants — how much you need depends on the garment, the fabric, how the hem was originally constructed, the fold style you’re using, and how the finished edge should look.
Measure, Check, Then Cut
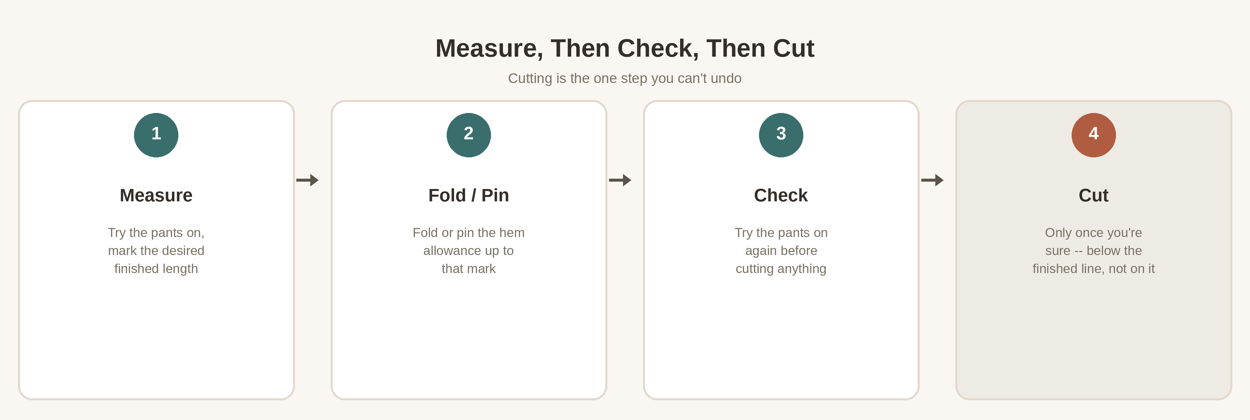
Because cutting can’t be undone, it’s worth treating it as the last step rather than an early one. Measure and mark the finished length, fold or pin the hem allowance up to that mark, try the pants on again to check how it actually looks and feels before removing any fabric, and only then cut — below the finished line, never on it. If you’re at all uncertain about the length, pinning or folding the proposed hem and trying the pants on before cutting is a reasonable extra step that costs you a few minutes and protects you from a mistake that costs you the pants.
Managing the Raw Edge
Once cut, the raw edge may need to be enclosed, folded under, or otherwise finished depending on the fabric — not every fabric frays at the same rate, so how much attention this needs varies. A fabric that frays easily benefits from having the raw edge tucked inside the fold or otherwise secured; a more stable fabric may need less intervention.
Pressing the Fold
Pressing the folded hem with an iron before stitching can make for a cleaner, more controlled fold to sew along. That said, check the garment’s care information first — heat tolerance varies by fabric, pressing isn’t safe at the same temperature for every material, and there’s no single iron setting that works universally across fabrics. When in doubt, a lower setting and a test on an inconspicuous area (like the inside of a seam allowance) is a reasonable way to check before pressing the visible fold.
Choosing a Hand-Hemming Stitch
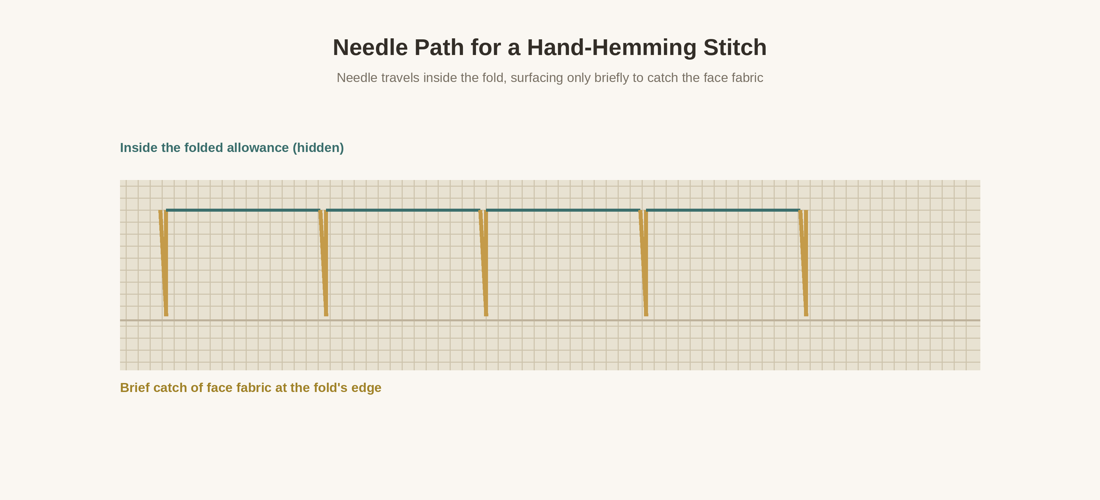
A few hand-hemming approaches are all reasonable depending on the fabric and how much the stitching should show: a slip stitch, a blind-style hand hem, or a catch stitch where that suits the fabric better. None of these is universally the best choice — Basic Hand Stitches Every Beginner Should Know covers stitch mechanics that apply here. Whichever you choose, the shared idea is the same: the needle travels mostly hidden inside the folded allowance and only briefly surfaces to catch a small amount of the visible fabric.
How Much Fabric to Catch
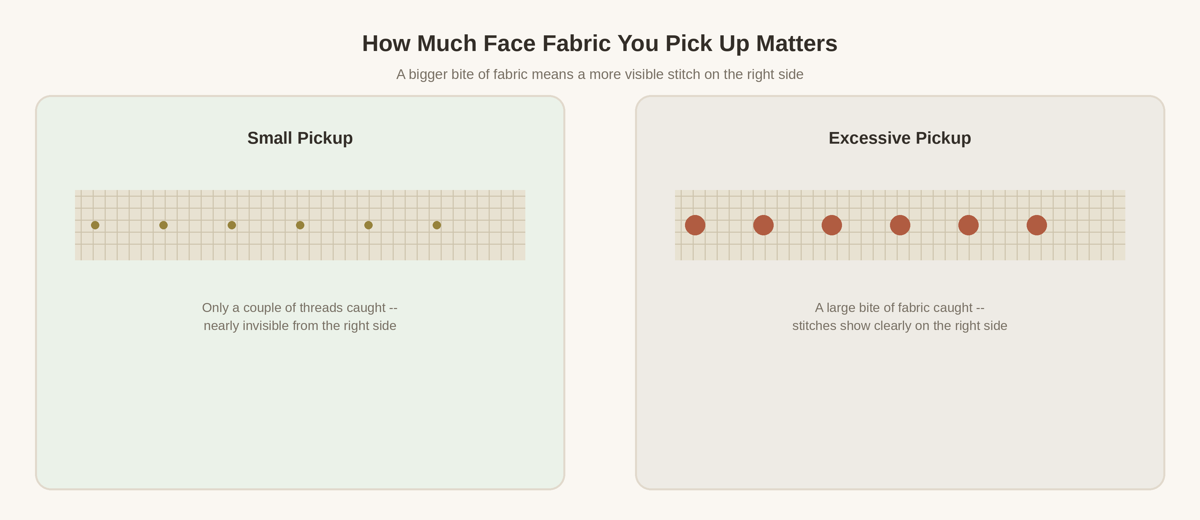
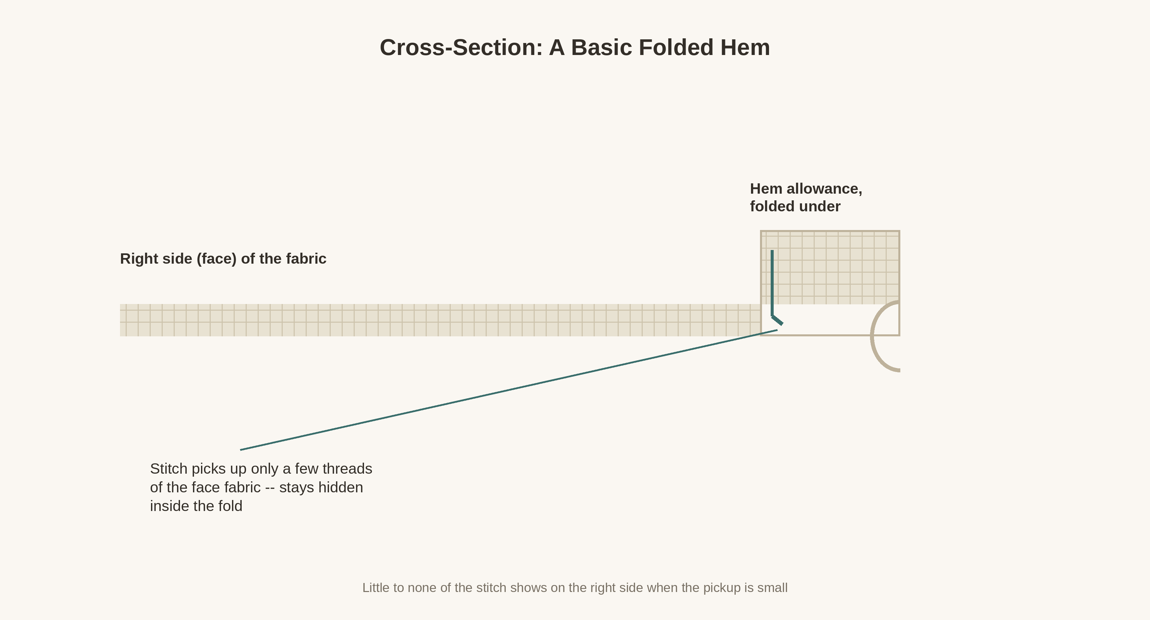
How much of the visible fabric your needle picks up on each stitch directly affects how noticeable the hem is from the outside. A small pickup — just a couple of threads — keeps the stitching minimal on the garment’s face. Picking up more fabric than that makes each stitch more visible. It’s worth being realistic here rather than promising too much: even a careful, minimal-pickup hand hem is usually described as less visible or less noticeable up close, not truly invisible.
Stretch Fabric Needs a Different Approach
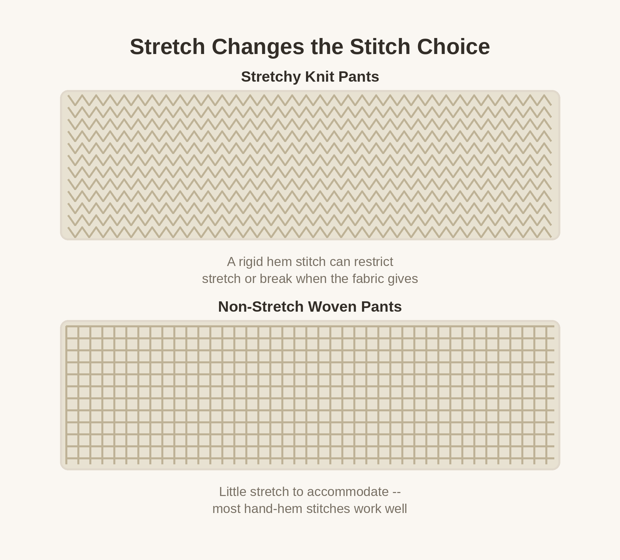
A hand-hemming method that works well on sturdy, non-stretch fabric isn’t automatically right for stretchy knit pants. A rigid hem stitch on a fabric that’s meant to stretch can restrict that stretch or even break when the fabric moves the way it’s supposed to. Denim, woven dress pants, stretchy knit pants, and delicate fabrics don’t all call for the same approach — if the hem needs to stretch with the fabric, the stitch, thread, and technique all need to accommodate that, and some fabric and construction combinations are genuinely less beginner-friendly than others.
When Professional Alteration Is Worth Considering
A few situations are worth pausing on before hemming pants yourself: lined trousers, pants with cuffs, a complex original hem construction, very delicate material, an expensive or hard-to-replace garment, or a length change substantial enough to affect the taper or overall silhouette of the leg. None of these make a hand-sewn hem impossible at home — but they’re the situations where a mistake costs more, so it’s worth being honest about your own experience level before committing to cutting into pants that matter to you.
Checking the Finished Hem
Try the pants on and actually look. Check both legs, from the front and from behind. Check how visible the stitching is up close and from a normal standing distance. Confirm the hem doesn’t restrict normal movement — walking, sitting, bending. Check that the fold lies flat rather than twisting or puckering, and confirm the thread feels secure. These checks catch a problem while it’s still easy to fix, rather than after you’ve worn the pants a few times.
Getting Started
How to Choose a Sewing Needle for Hand Sewing, How to Choose Thread for Clothing Repairs, and How to Start and Finish Hand Sewing Without the Thread Coming Loose cover the fundamentals this project builds on.