A loose or missing button is one of the most common clothing repairs, and one of the most approachable — but “sew the button on” covers a few different situations that aren’t quite identical. You might be tightening a button that’s still attached but wobbling, reattaching the original button that fell off and that you still have, or attaching a full replacement because the original is gone. The core technique is the same across all three; this covers what’s shared and flags the few places where they genuinely differ.
Button Types: What You’re Working With
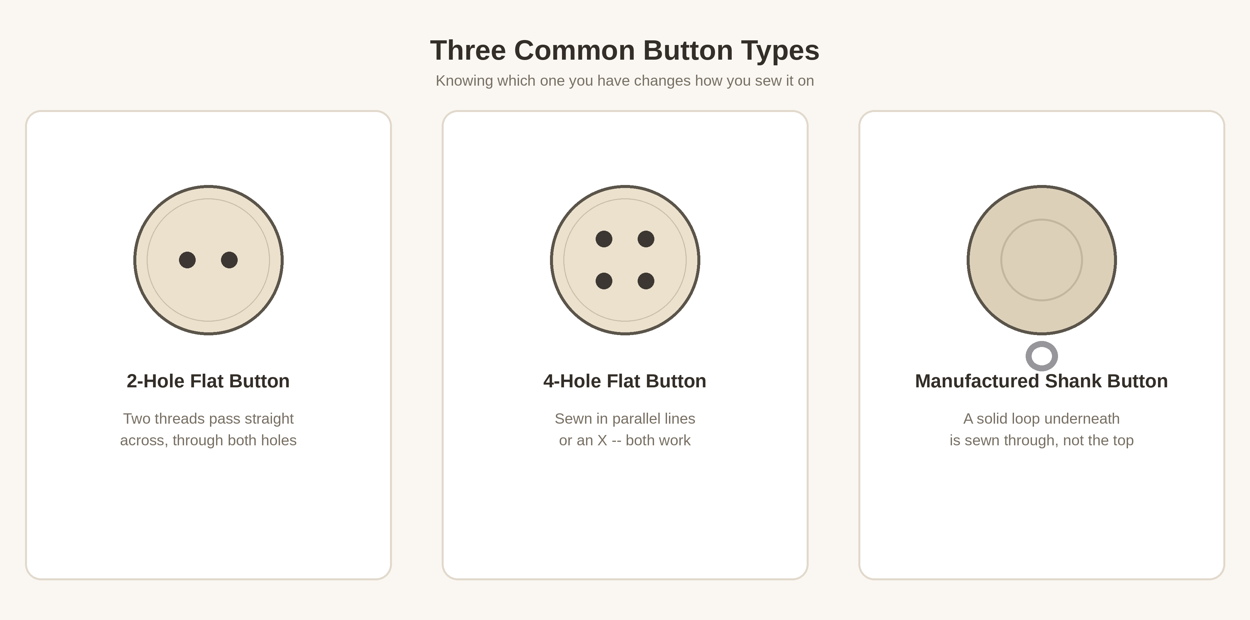
Most buttons fall into one of three types, and knowing which one you have changes how you sew it on. A 2-hole flat button takes thread straight across both holes. A 4-hole flat button works the same way, sewn in either parallel lines or an X — both are functionally fine, and if other matching buttons are still on the garment, sewing the new one to match them keeps things visually consistent. A manufactured shank button is different from the other two: instead of holes in the button face, it has a solid loop molded or attached underneath, and the thread goes through that loop rather than through the button top.
It’s worth being clear about one distinction here, because the terms get confused: a manufactured shank is a built-in part of the button itself. A thread shank, covered further down, is something you build yourself out of thread when sewing on a flat button. They serve a similar purpose — giving the button some clearance from the fabric — but they aren’t the same thing, and a flat button doesn’t have a manufactured shank to rely on.
What You’ll Need
A hand sewing needle and thread that suits the fabric and the stress the button will take — How to Choose Thread for Clothing Repairs covers matching thread to the job in more detail. All-purpose polyester thread is a reasonable default for most garments. Doubling the thread is common for button repairs, since it reduces the number of passes needed to build a secure hold, though it isn’t the only workable approach.
Sewing On a Flat Button
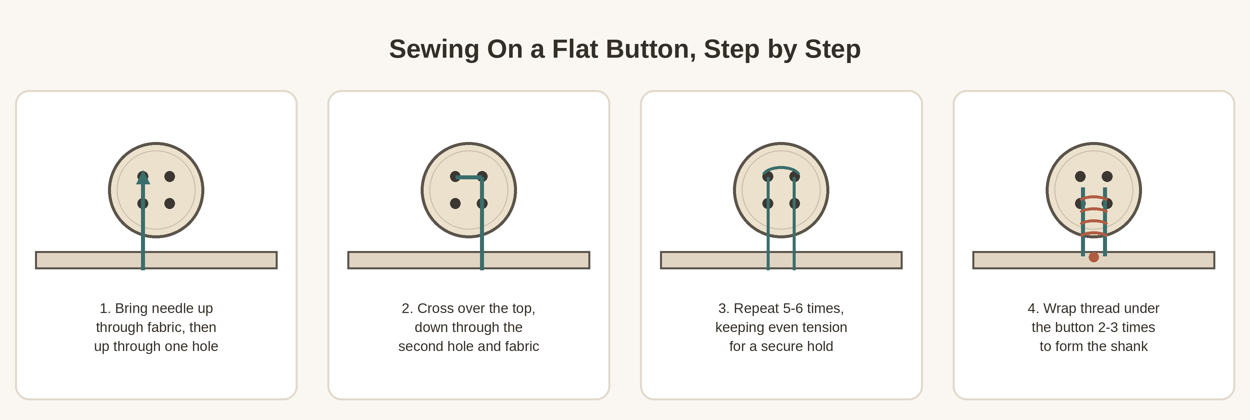
Bring the needle up from the underside of the fabric and up through one hole of the button. Cross over the top of the button and back down through a second hole and through the fabric. Repeat this several times — there’s no single correct stitch count; enough passes to feel genuinely secure when you tug gently on the button is the practical target, and it will vary with thread thickness and how much stress the button takes. Keep the tension even as you go: pulled too tight, the button can sit rigid and strained against the fabric; too loose, and it won’t hold.
On a 4-hole button, use parallel lines through one pair of holes, then the other, or cross in an X through all four — both patterns hold equally well.
4-Hole Patterns: Either One Works
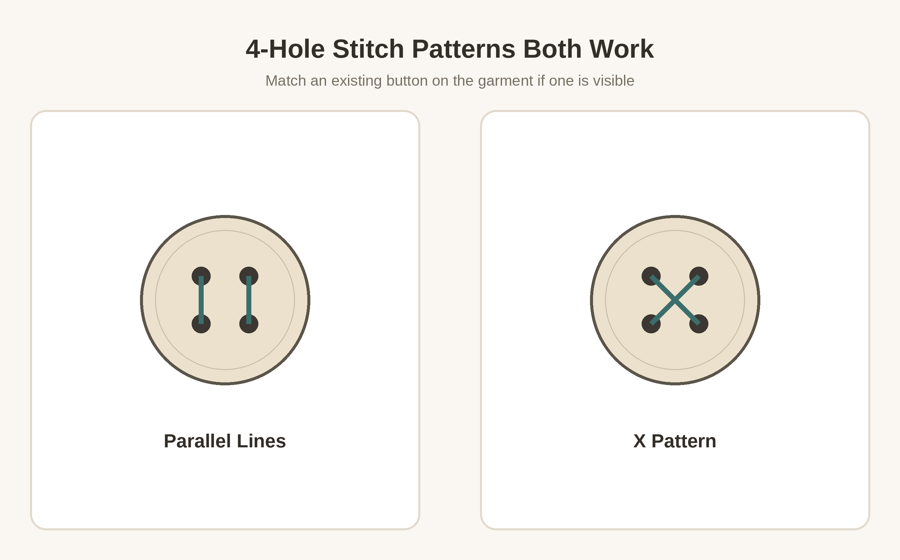
There’s no functional advantage to one pattern over the other on a 4-hole button. If you’re replacing one button among several matching ones still on the garment, matching the existing pattern is mostly a matter of appearance rather than durability — but it’s an easy detail to get right, so it’s worth a quick look at a neighboring button before you start.
Giving It a Thread Shank — When It’s Needed
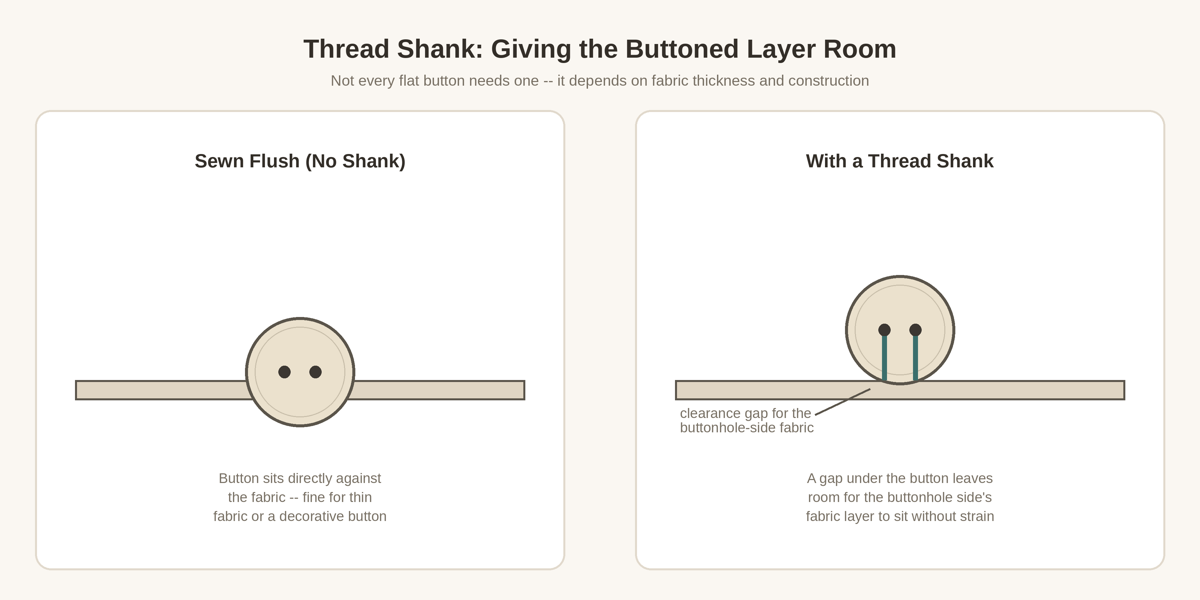
Some flat buttons benefit from being sewn with a small gap between the button and the fabric rather than flush against it. That gap — the thread shank — gives the fabric layer on the buttonhole side somewhere to sit without straining the button or puckering the fabric around it. Whether you need one, and how much clearance to leave, depends on the fabric thickness, how the garment is constructed, and how substantial the buttonhole is. A button on a thick coat generally wants more clearance than a small button on a thin shirt; a decorative button with no functional buttonhole often doesn’t need one at all. There’s no single correct number of thread wraps to build a shank — enough to create clearance that roughly matches the fabric thickness on the buttonhole side is the practical guide, not a fixed count.
To build one: after your last pass through the button and fabric, don’t pull the thread all the way flush. Instead, wrap the thread a few times around the small stitches between the button and the fabric before securing it — this is the wrapped section shown in step 4 above. If matching buttons remain on the garment, feeling how much clearance they have is a useful reference point.
Attaching a Manufactured Shank Button
If the button already has a built-in shank loop, you don’t need to build a thread shank — the loop already provides the clearance. Bring the needle up through the fabric, pass it through the shank loop, and back down through the fabric, repeating several times the same way you would for a flat button, keeping the button’s loop oriented so it sits naturally with the direction the garment will be buttoned.
Getting the Position Right Before You Commit
If you’re reattaching the original button, look for small holes, thread remnants, or a faint outline in the fabric that mark where it was — lining up with those keeps the buttonhole fitting the way it did before. If you’re attaching a replacement and there’s no clear mark, button the garment closed (or line it up against a similar closed garment) and mark where the button needs to sit so the buttonhole lands over it correctly.
Before sewing permanently, it’s worth checking the position with a couple of loose stitches or by holding the button in place and test-buttoning the garment — checking that it aligns with the buttonhole and, if there are other buttons on the same garment, that it’s roughly level with them. A few extra seconds here avoids resewing a button that turns out to be misaligned once it’s already secured.
When the Fabric Underneath Is Weakened
This matters more than it might seem. If the fabric around the old button holes is torn, enlarged, frayed, or otherwise noticeably weakened — which happens over time on a button that’s been stressed repeatedly — sewing the new button straight through that same damaged area usually doesn’t hold well and can make the damage worse. The thread has little sound fabric to actually grip. In that situation, the area generally needs some reinforcement underneath before the button goes back on, rather than repeated stitching straight through the weak spot. A small patch of sturdy fabric or interfacing stitched to the wrong side behind the button area is a common way to give the new stitching something solid to hold onto; if the damage is more than minor, it may be worth having it reinforced by someone experienced, or treating it as a slightly bigger repair than “just a button.”
Securing the Thread Without Bulk
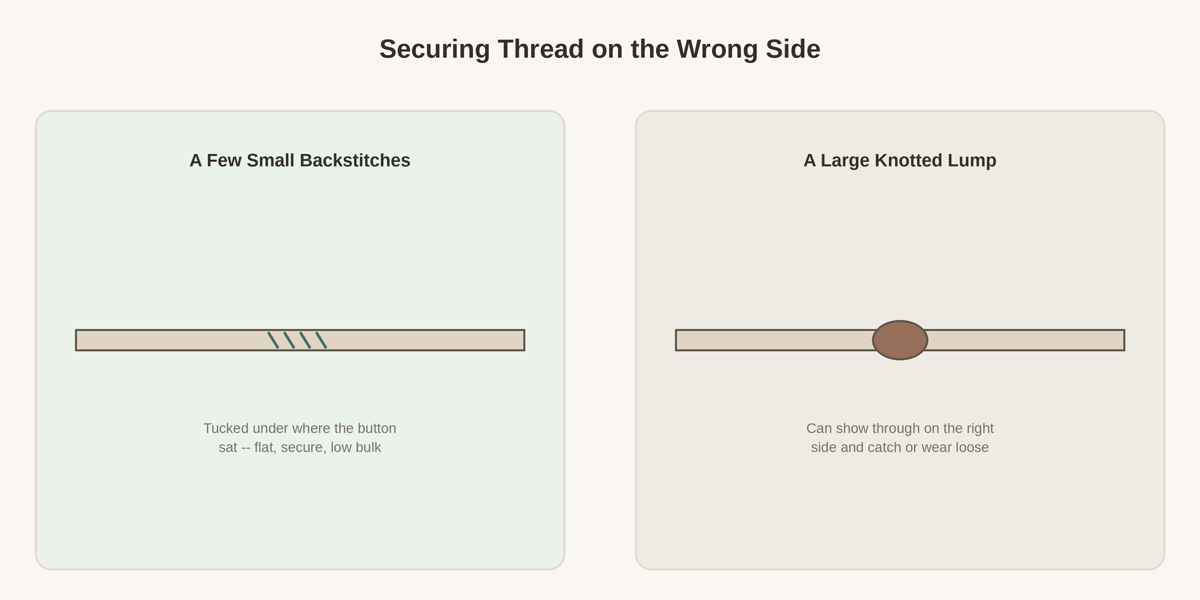
Once the button (and shank, if you’re using one) is sewn, secure the thread on the wrong side of the fabric rather than tying a single large knot on the surface. A couple of small stitches taken in place, tucked under where the button sits, hold as well as a knot without creating a lump that can show through thin fabric or catch and wear loose over time. How to Start and Finish Hand Sewing Without the Thread Coming Loose covers this kind of secure finish in more detail if you want the fuller technique.
Testing the Repair
Before considering it done, check a few things: that the button aligns with the buttonhole when the garment is closed, that the buttonhole side has enough clearance to sit without straining, that the button doesn’t wobble excessively when nudged, and that the thread feels secure when tugged gently. Catching a problem now is much easier than redoing the repair later.
Troubleshooting
| What’s Happening | Likely Cause |
|---|---|
| Button sits too tightly against the fabric | Little or no thread shank — may need more clearance if the buttonhole side feels strained |
| Button wobbles excessively | Not enough stitch passes, or tension was too loose while sewing |
| Button sits crooked | Position wasn’t checked before the final stitches — realign and resew |
| Thread keeps tangling while sewing | Try a shorter length of thread, or reduce twist by letting the needle hang and spin loose occasionally |
| Thread keeps breaking | Check the thread weight suits the fabric and that it isn’t dragging against a rough hole edge in the button |
| Button doesn’t align with the buttonhole | Recheck position with the garment closed before resewing permanently |
| Fabric underneath is damaged | Reinforce the area before sewing the button back through it — see the section above |
Getting Started
If hand sewing is new to you, Essential Sewing Tools for Beginners and Basic Hand Stitches Every Beginner Should Know cover the basics this repair builds on, and a button is one of the most practical first projects to try them on.