Crooked or uneven hand stitching is one of the most common early frustrations, and it’s rarely about a lack of natural steadiness — it’s usually one of a few specific, fixable habits. “Straight” here doesn’t mean mathematically perfect either; even experienced hand sewing has small, natural variation. What actually matters is keeping the line under control, not eliminating every imperfection. This applies across whichever stitch you’re using — see Basic Hand Stitches Every Beginner Should Know for the stitches themselves; this covers the shared technique for keeping any of them on track.
Give Your Stitches a Path to Follow
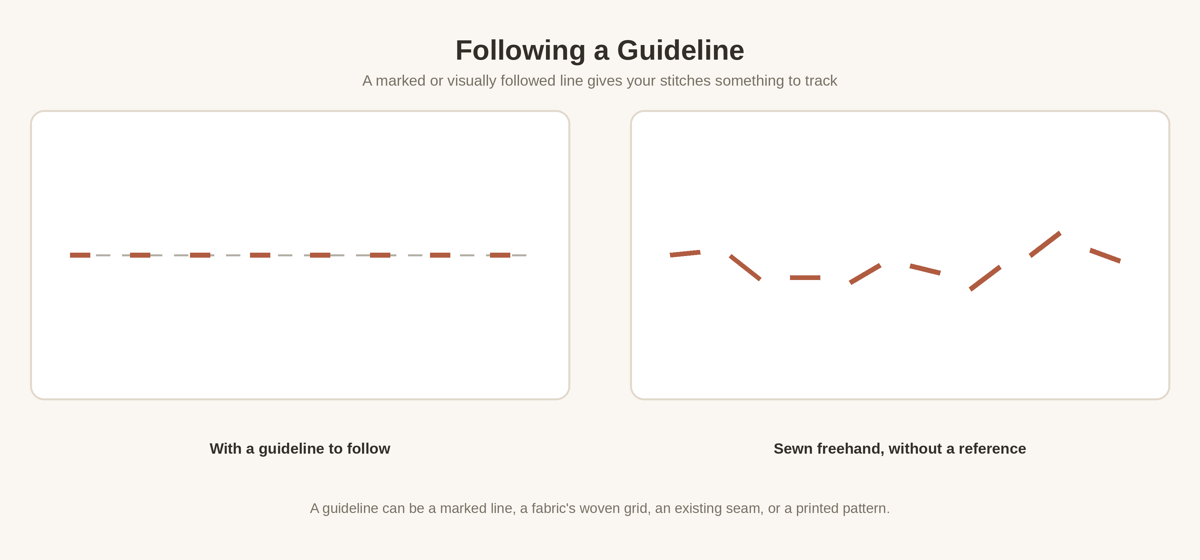
Sewing freehand, with nothing to reference, is a large part of why lines drift. A guideline gives your eyes and hands something concrete to track instead of estimating as you go. That guideline doesn’t have to be a special tool: a fabric marking pen or tailor’s chalk works if you have one, but an existing seam, a fold, the fabric’s own woven grid, or a printed stripe or pattern all work just as well as something to follow.
Consistent Spacing Matters More Than Speed
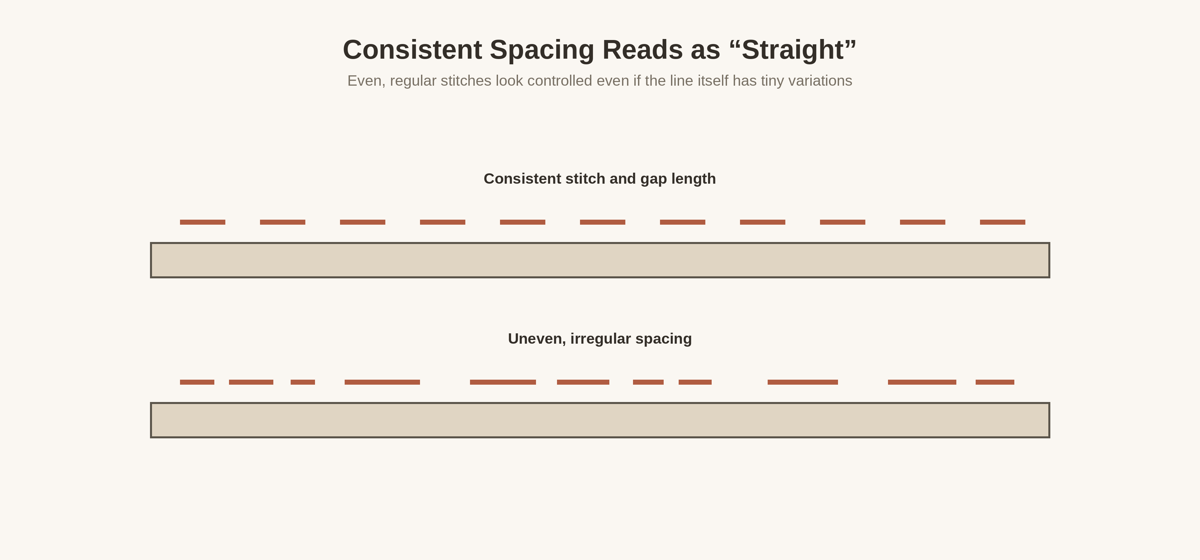
A line reads as “straight” largely because the stitches are evenly spaced, not because each one is placed with perfect precision. There’s no single stitch length that’s correct to aim for — as covered in Basic Hand Stitches, the right length depends on the fabric and the purpose of the stitch. What matters here is consistency: roughly the same stitch length and the same gap, repeated down the line, rather than rushing and letting the spacing vary. Slowing down slightly to keep a steady rhythm usually does more for the finished look than trying to sew faster.
Thread Tension and Puckering
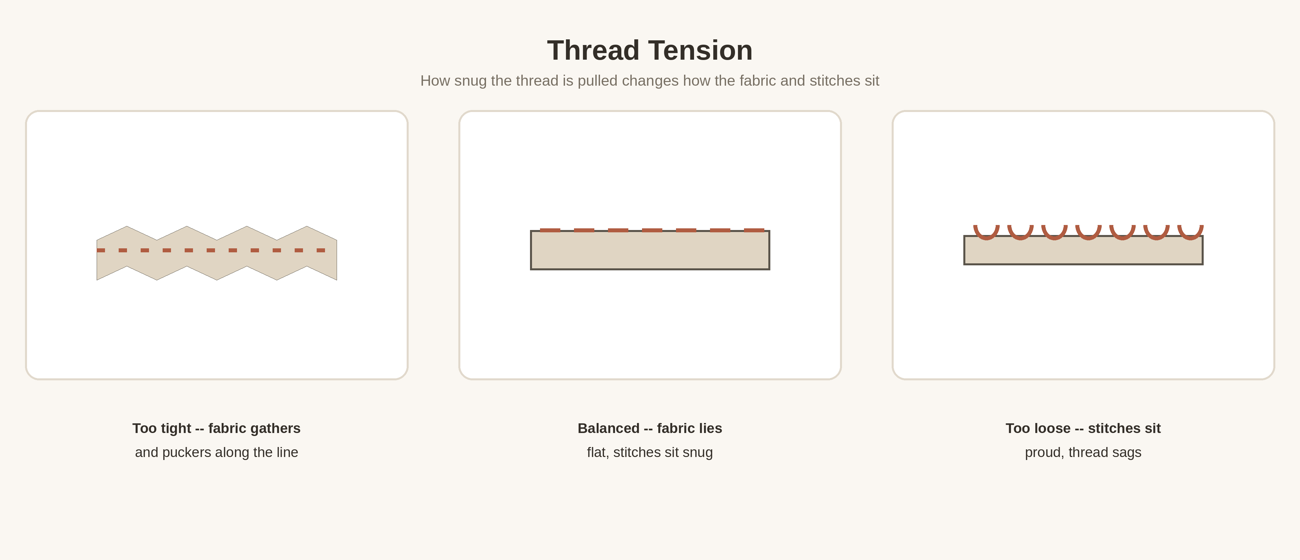
How snug you pull the thread after each stitch changes how both the thread and the fabric sit. Pulled too tight, the fabric gathers and puckers along the stitch line — the thread is essentially shrinking the fabric between stitches. Pulled too loose, the stitches sit proud of the surface instead of lying flat, and the thread can sag or loop visibly. Between those two is a balanced tension where the fabric lies flat and the stitches sit snug against it without gathering anything. This takes some feel to find, and it can vary by fabric — lightweight or loosely woven fabric puckers more easily than sturdy, tightly woven fabric under the same tension.
Support the Fabric Instead of Pulling It
How you hold the fabric matters as much as the stitching itself. Let the fabric rest supported — in your lap, against a table, or held loosely between both hands — rather than stretching or pulling it taut as you sew. Fabric that’s been stretched while you stitch tends to pucker or distort once you let go and it relaxes back to its natural shape, which can throw off a line that looked straight while you were sewing it.
Needle Angle and Direction
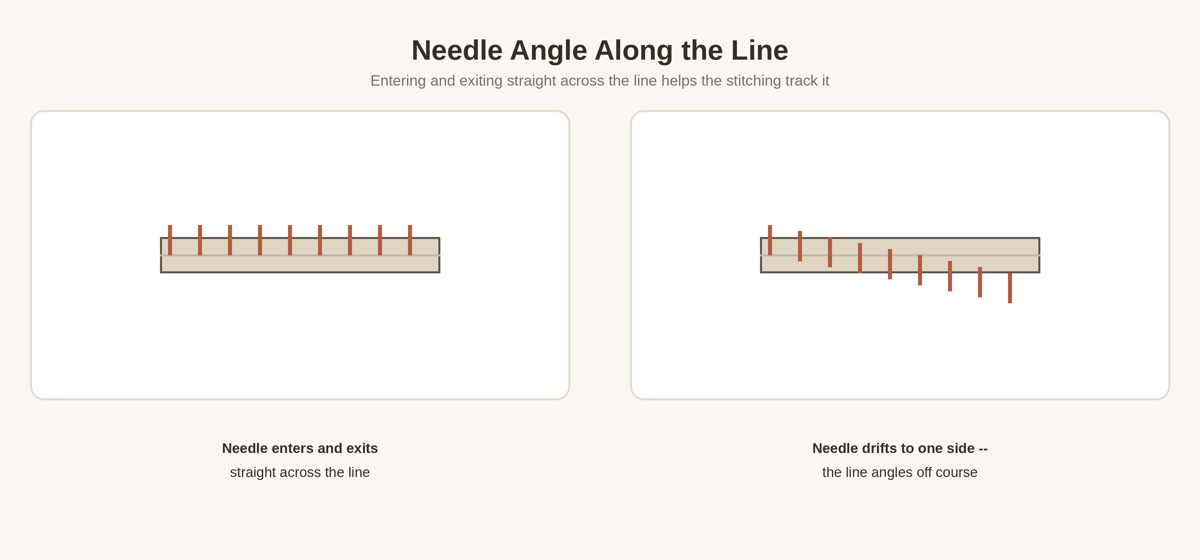
Where the needle enters and exits relative to your guideline has a direct effect on where the line ends up. If the needle consistently enters and exits at a slight angle to one side rather than straight across the line, the stitching gradually drifts in that direction, even if each individual stitch looks fine on its own. Checking that the needle crosses the line squarely, rather than at a creeping angle, catches this before it becomes an obvious drift.
Practicing Before You Commit to the Repair
If a repair is on a visible part of a garment you care about, it’s reasonable to practice the stitch and the pace you’re planning to use on a scrap of similar fabric first — an old pillowcase, a worn-out shirt, anything you’re not worried about. A few minutes of practice is often enough to find a comfortable rhythm and check your tension before working on the actual repair.
Troubleshooting: When the Line Still Comes Out Wrong
| What’s Happening | Likely Cause |
|---|---|
| The line curves or drifts gradually to one side | Check the needle’s entry and exit angle — it may be creeping to one side instead of crossing straight across the guideline |
| The fabric bunches or gathers along the stitching | Thread tension is likely too tight — ease up slightly and let the fabric lie flat between stitches |
| The fabric puckers even though the stitches look even | The fabric may have been held stretched while sewing — try supporting it loosely instead of pulling it taut |
| Stitch length or spacing looks uneven | Slow down and aim for a steady rhythm rather than speed; a marked guideline can also help keep spacing consistent |
Getting Started
This assumes you’ve already got a threaded needle and a stitch chosen — How to Thread a Needle (Even With Poor Eyesight), How to Start and Finish Hand Sewing Without the Thread Coming Loose, and Basic Hand Stitches Every Beginner Should Know cover those steps, and Essential Sewing Tools for Beginners covers what’s worth having on hand before you start.
If you’re working by machine instead of by hand, How to Practice Sewing Straight Lines on a Machine covers the machine-specific version of this same skill.