Most beginner clothing repairs come down to a handful of stitches, not dozens. Knowing four — running stitch, backstitch, whipstitch, and slip stitch — covers the large majority of what you’ll actually run into. This walks through what each one is for, where it falls short, and how to tell them apart, rather than a full stitch dictionary you’ll never use most of.
Running Stitch
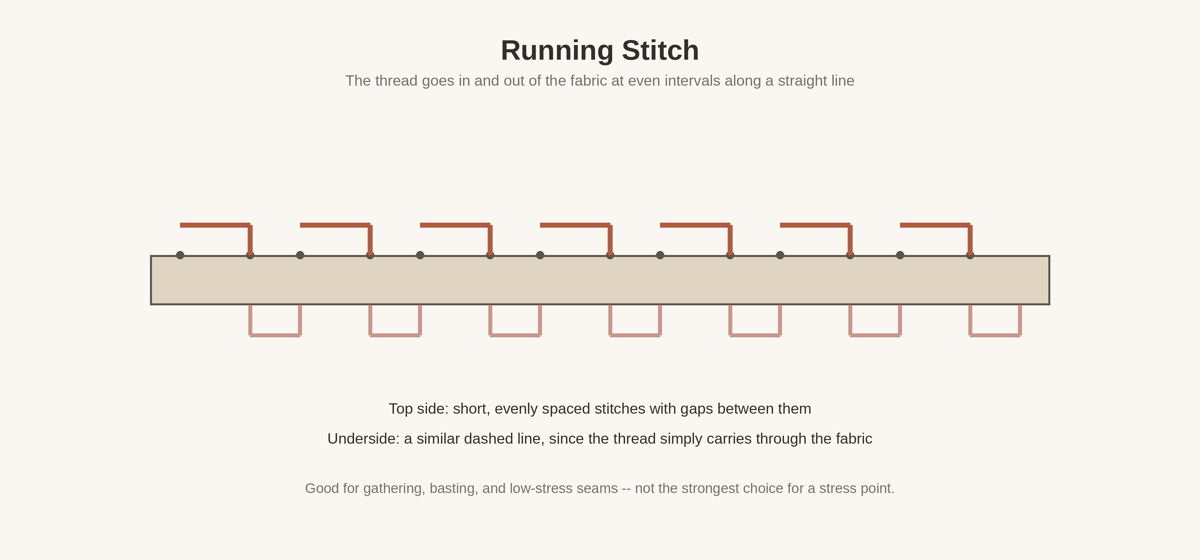
The needle simply goes in and out of the fabric in a straight line, at whatever spacing you choose — down through the fabric, back up a short distance later, down again, and so on. It’s the simplest stitch to learn and the fastest to sew.
It’s genuinely useful for basting (temporary stitches you’ll remove later), gathering fabric, and light, low-stress seams. It’s not the stitch to reach for on something that will be pulled or stressed repeatedly — a seam under real strain is more likely to hold with a backstitch instead. On the fabric itself, a running stitch shows as a dashed line on both the top and the underside, since the thread simply carries straight through — it doesn’t hide on either side.
Backstitch
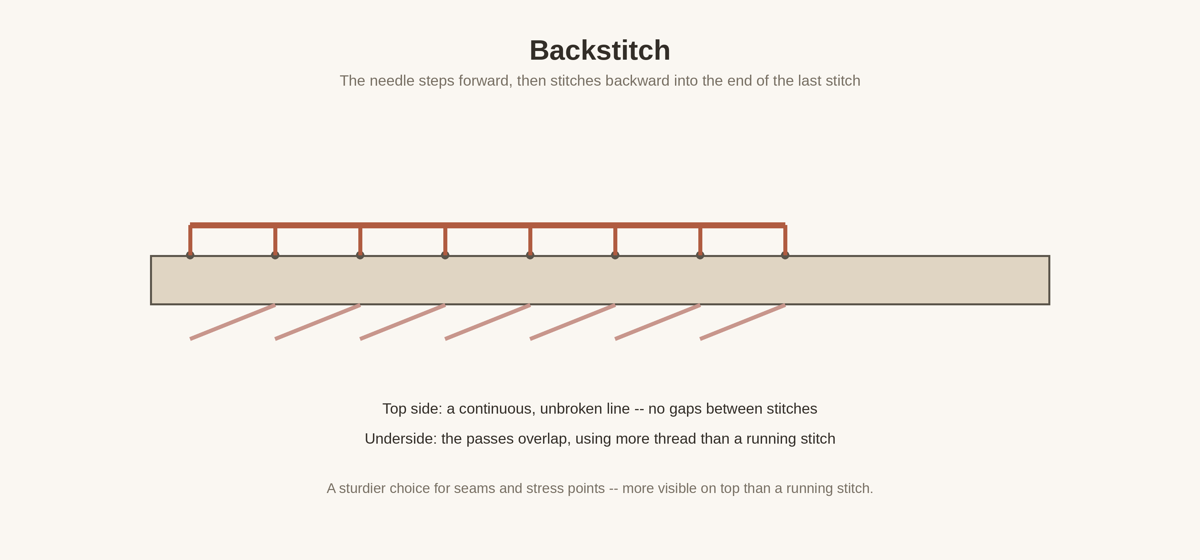
The needle comes up ahead of where the last stitch ended, then goes back down into that same point — stepping forward on top, then stitching backward into the previous stitch. The result is a continuous, unbroken line on the top surface, with the passes underneath overlapping each other.
This generally makes backstitch a sturdier choice than a running stitch for seams and stress points, since there’s no gap in the line for the fabric to pull apart at. The trade-off is that it uses more thread and is more visible on the top surface — a solid line rather than a dashed one — which matters if you’re hoping to keep a repair low-profile. Watch the top surface as you sew to keep the line even; the underside will naturally look doubled compared to a running stitch.
Whipstitch (Overcast Stitch)
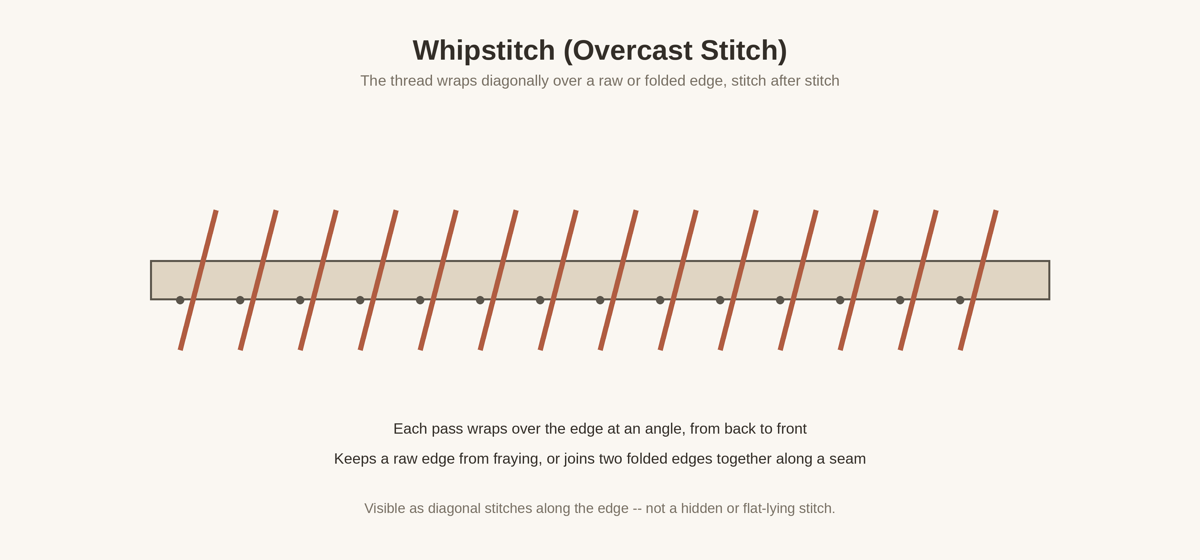
Worked over an edge rather than along a flat seam, the thread wraps diagonally over the fabric edge from back to front, stitch after stitch along the edge. It’s useful for keeping a raw edge from fraying, or for joining two folded or finished edges together, like closing a gap along a pressed seam.
It’s a clearly visible stitch by design — a row of diagonal lines along the edge — so it’s not the choice for something you want to stay low-profile on the outside. Work with the edge facing you, turning or rotating the fabric as needed, rather than trying to sew it flat.
Slip Stitch (Ladder Stitch)
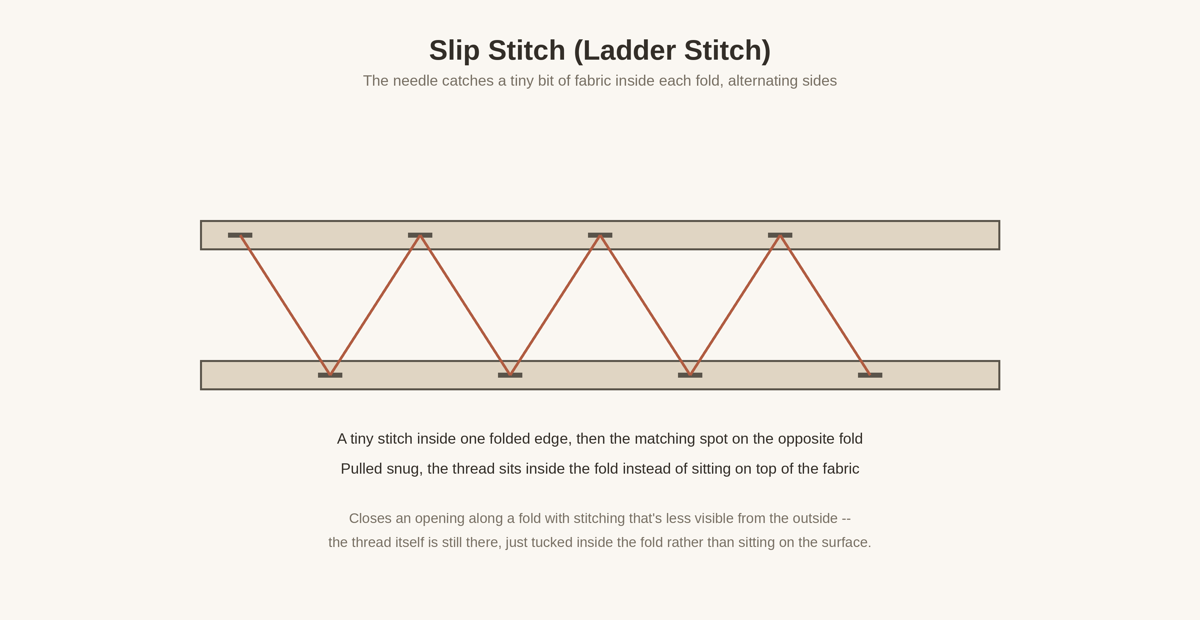
Worked inside a fold, the needle catches a tiny bit of fabric just inside one folded edge, then the matching spot directly across on the opposite fold, alternating back and forth. Left loose, this looks like a ladder between the two folds — pulled snug, the thread draws the two folds together and settles inside the fold rather than sitting on the visible surface.
This makes it a good choice for closing an opening along a folded edge — finishing a patch, closing a turned cuff, or a hem where you don’t want stitching showing on the outside. It’s less visible from the outside than a backstitch or whipstitch, not invisible — you can usually still find it up close, and the thread is fully visible from the inside where it bridges across the fold. It’s not a structural stitch: it closes a seam neatly, but it isn’t the one to reach for on something that needs to hold real stress.
Choosing Between Them
| Stitch | Good For | Skip When | Visibility |
|---|---|---|---|
| Running stitch | Basting, gathering, light low-stress seams | The repair needs to hold real strain | A dashed line on both sides — not hidden on either |
| Backstitch | Seams and stress points that need to hold | You want minimal visible thread on top | A solid, continuous line on top |
| Whipstitch | Finishing a raw edge, joining two folded edges | You want the stitching to stay low-profile | Clearly visible diagonal stitches |
| Slip stitch | Closing an opening along a fold neatly | The seam needs to handle real stress | Less visible from the outside than the others, not hidden |
None of these four is the universally correct choice — a repair often calls for one of them specifically because of what it’s being asked to do, not because it’s generally the “best” stitch.
Stitch Length and Spacing
There’s no single stitch length that’s correct across the board. It depends on the fabric’s weight, the thread, and the purpose of that particular stitch — basting is often sewn with longer stitches since it’s temporary and speed matters more than neatness, while a permanent seam is usually sewn shorter for a cleaner, more secure result. Heavier fabric can generally tolerate a longer stitch than lightweight or delicate fabric, where shorter stitches distribute stress across more points and leave smaller holes. Shorter stitches take longer and use more thread; longer stitches are faster but can be less durable for a repair meant to last. Adjusting based on what you’re actually sewing matters more than sticking to one fixed number. How to Sew a Straight Line by Hand covers the rest of what keeps a line of any of these stitches under control.
Getting Started
Each of these stitches assumes you’ve already got a threaded, secured needle in hand — How to Thread a Needle (Even With Poor Eyesight) and How to Start and Finish Hand Sewing Without the Thread Coming Loose cover those two steps if you haven’t already.